Documentation Index
Fetch the complete documentation index at: https://docs.amplication.com/llms.txt
Use this file to discover all available pages before exploring further.
schema.prisma file based on your database.
Amplication will instantly create entities, fields, and relationships based on your schema, significantly accelerating your development process and letting you focus on business logic, not database setup.
This feature quickly translates your existing database structure into Amplication’s internal model, giving you a ready-to-go starting point.
The Upload Schema feature is powered by Prisma’s Introspection CLI. Learn more about it on Prisma’s docs.
Also, this feature is only available when using the .NET or Node.js blueprints in Amplication.
Overview
When you upload a Prisma schema, Amplication inspects your existing database structure and generates corresponding entities, fields, and relationships. By standardizing and automating the process, Amplication helps you maintain consistency and best practices across your organization, saving significant time and reducing technical debt.Run the Introspection Process
To generate a Prisma schema from your existing database, you’ll use Prisma’s introspection feature.Create a Prisma Schema File
Create a file named Adjust the URL according to your database provider (e.g., PostgreSQL, MySQL, SQL Server).
schema.prisma in your project. In this file, set the url in the datasource block to point to your existing database:schema.prisma
Run Prisma Introspection
Navigate to the directory with your This inspects your database and generates models within
schema.prisma file, then run:schema.prisma.Create Your Initial Migration (Optional)
If you plan to use Prisma Migrate on your newly introspected database, consider “baselining” your database to align existing data with future migrations.Generate a Baseline Migration Script
In the same directory as your Review the generated
schema.prisma, run:migration.sql to ensure accuracy.Upload Your Prisma Schema File to Amplication
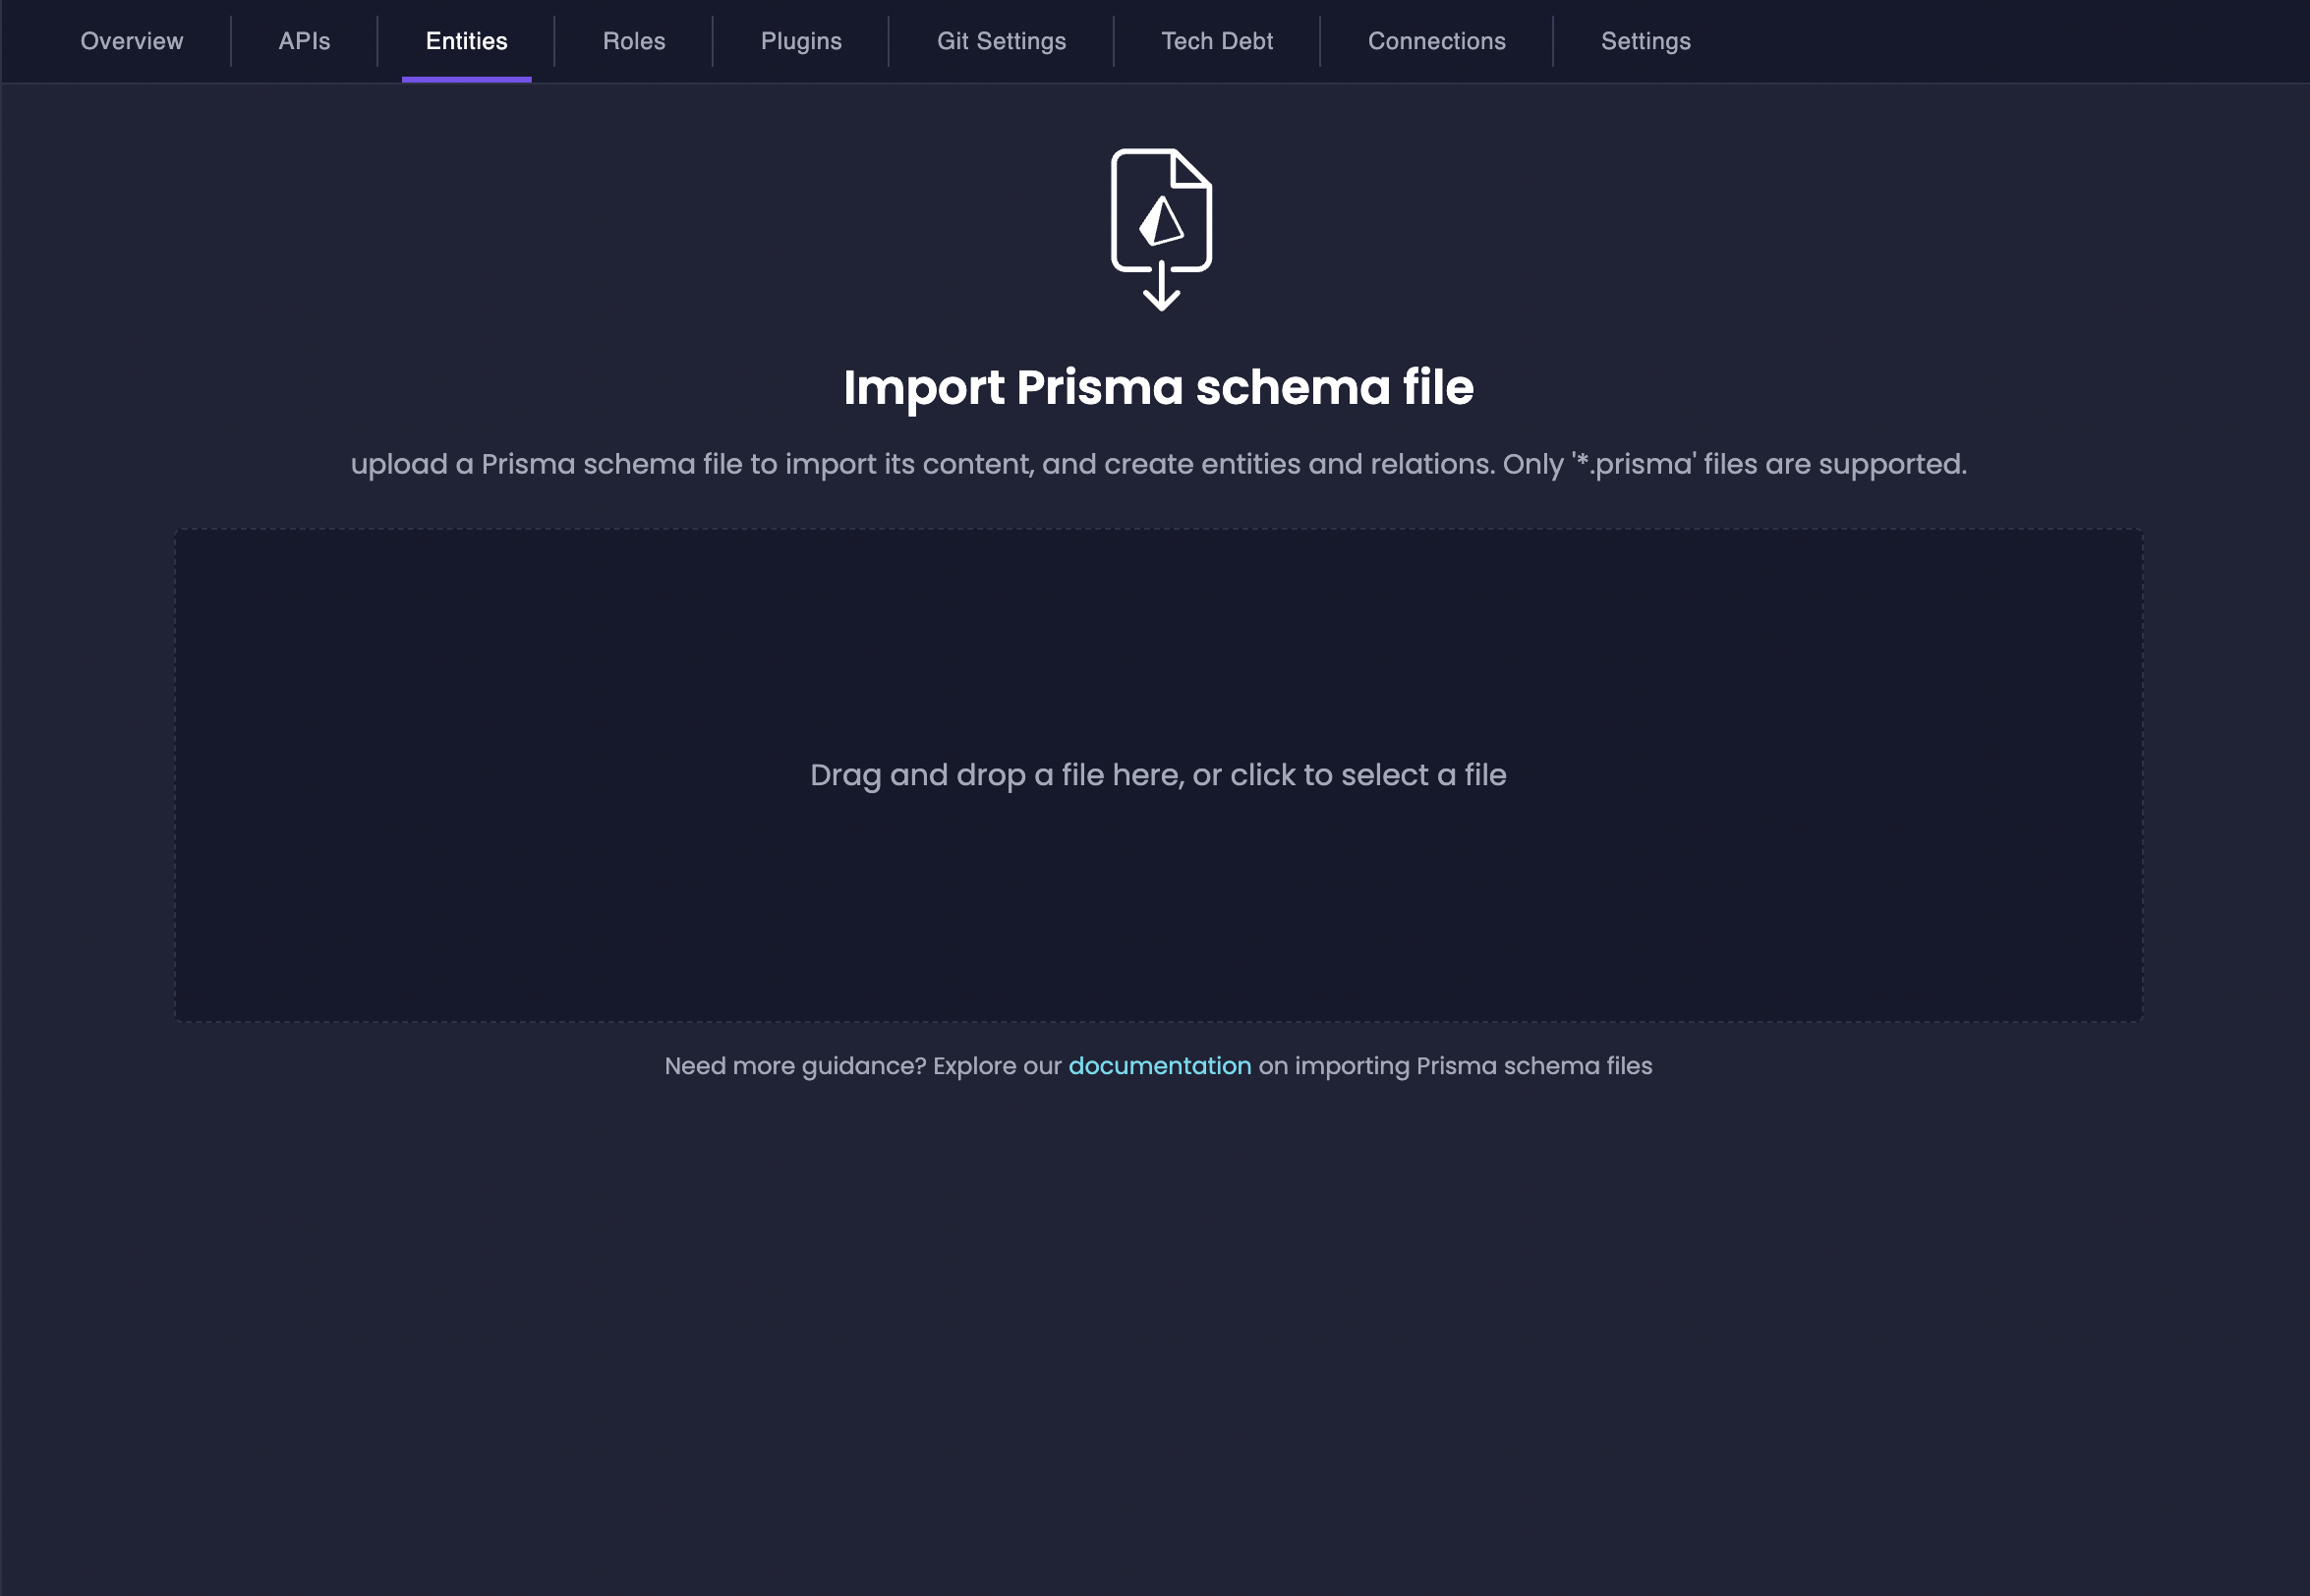
Once yourschema.prisma file is ready, upload it to Amplication from the Resources section of your service.
Open Your Resource in Amplication
Locate the service resource where you want to import your database schema.
Navigate to Entities
Click on the “Entities” tab in the navigation bar of your resource to access the entities page.
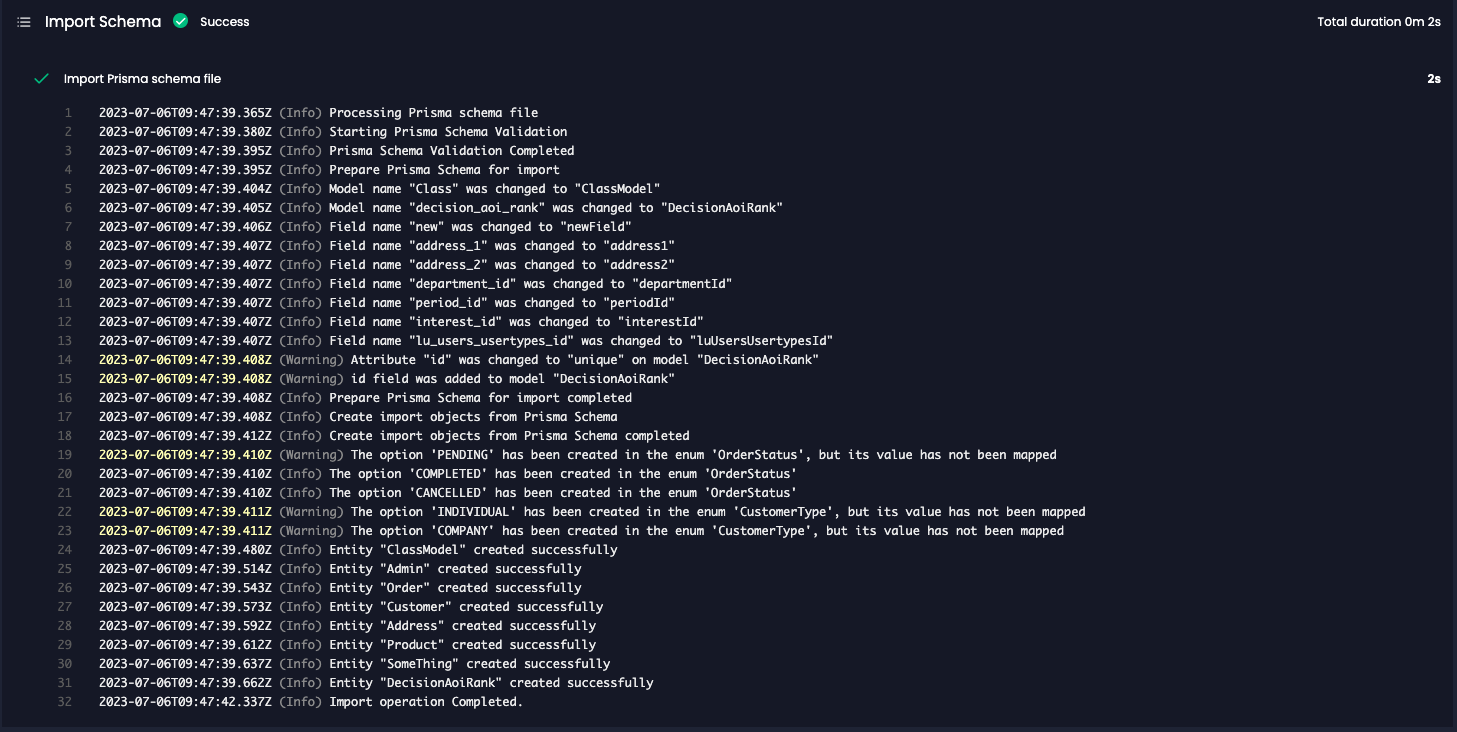
Check the Conversion Logs
After uploading, Amplication displays a log detailing the conversion of your Prisma models into entities. Review these logs to confirm that:- All expected models are detected.
- Fields and relationships match your existing database structure.
- No warnings require further action.
Review Your Newly Created Entities
Once conversion completes successfully, Amplication creates entities and fields corresponding to your models. You can visualize these in the ERD view to confirm relationships align with your database design.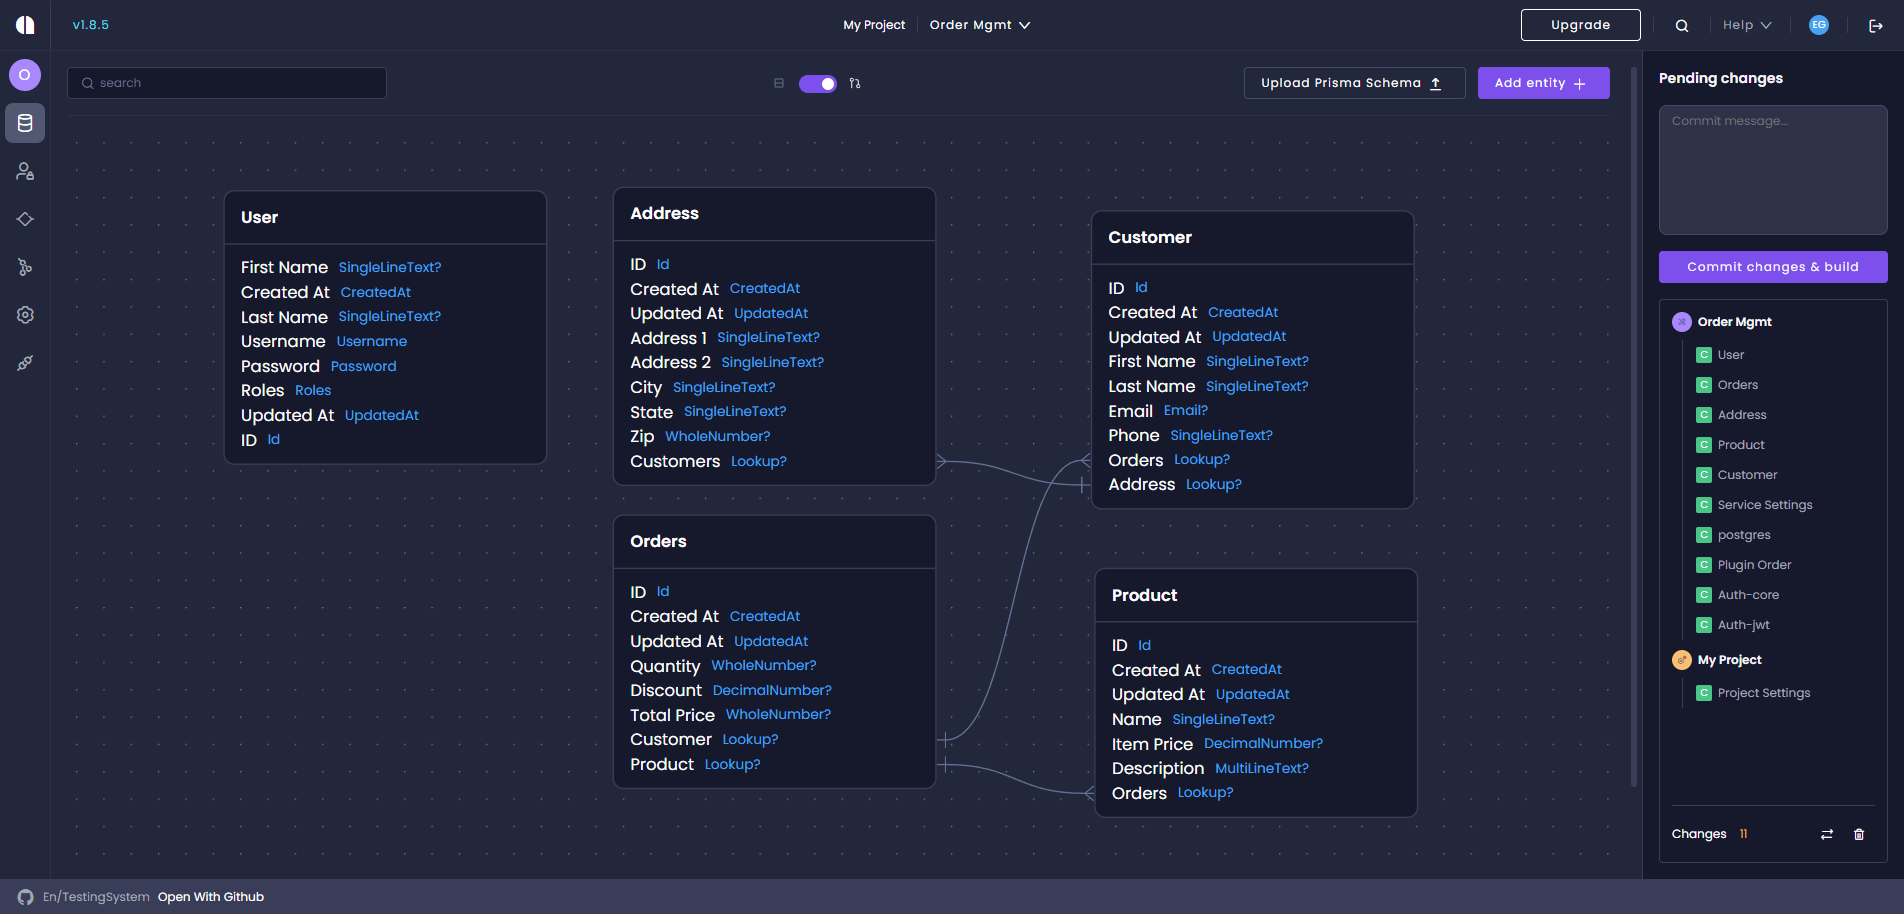
Apply Your Migration to the New Amplication Service
If you generated baseline migrations earlier or have an existing migration history, you can now merge that with your new Amplication resource:Commit Changes
Commit the newly generated entities and configuration to your preferred Git repository.
Update Environment Variables
In your
.env file (or your deployment environment), set the DB_URL to your existing database’s connection string.Copy Migrations Folder
Move or copy the previously created
migrations folder into the prisma directory of your new Amplication service repository.Next Steps
Learn More About Schema Upload
Dive deeper into how the schema upload process works and learn best practices for managing your database structure.
Create Custom Entities
Learn how to create and customize entities to extend your data model beyond the imported schema.
Define Custom Fields
Discover how to add and configure custom fields to enhance your entities with additional data points.