Documentation Index
Fetch the complete documentation index at: https://docs.amplication.com/llms.txt
Use this file to discover all available pages before exploring further.
How to Create a Resource from a Template
There are a couple of convenient ways to start creating a new resource from a template:-
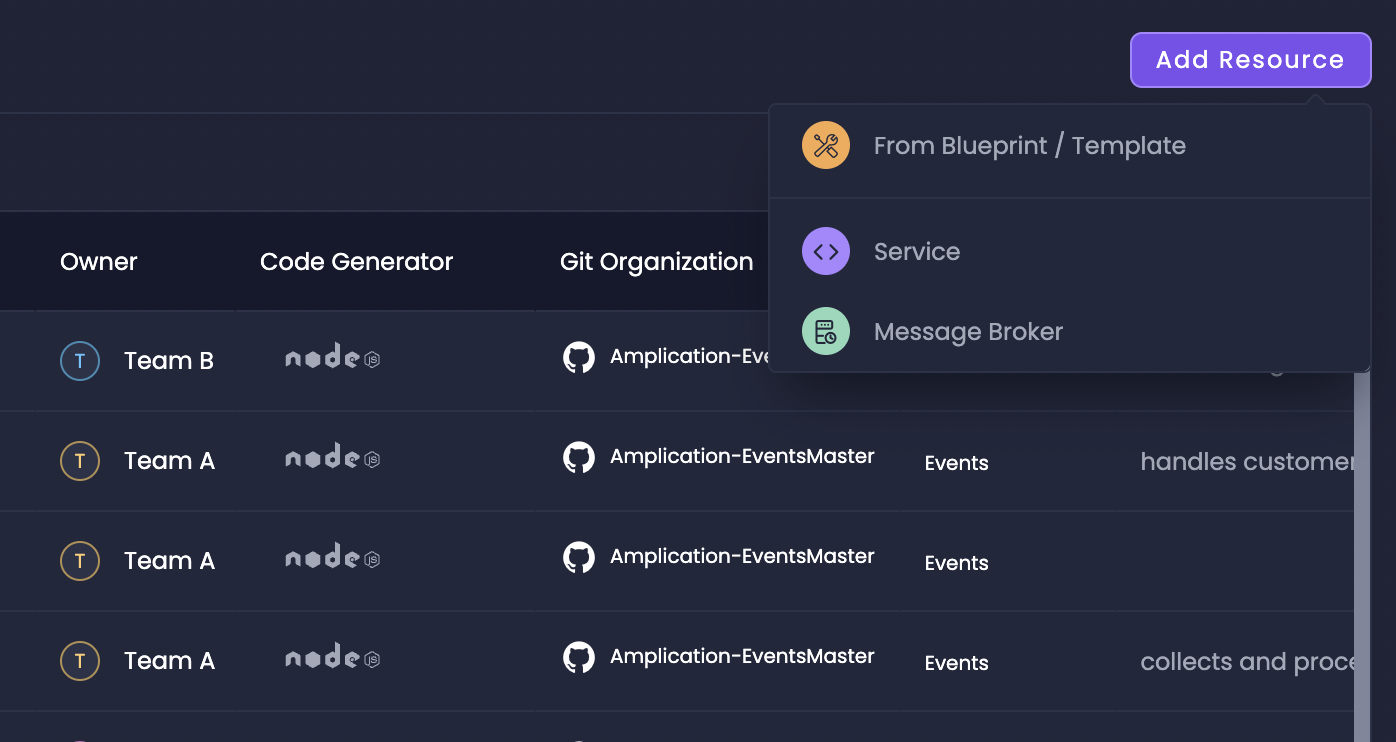
From the Workspace Catalog:
Navigate to the Workspace Catalog
Go to your Amplication workspace and select the Workspace Catalog tab. -
From Within a Specific Project:
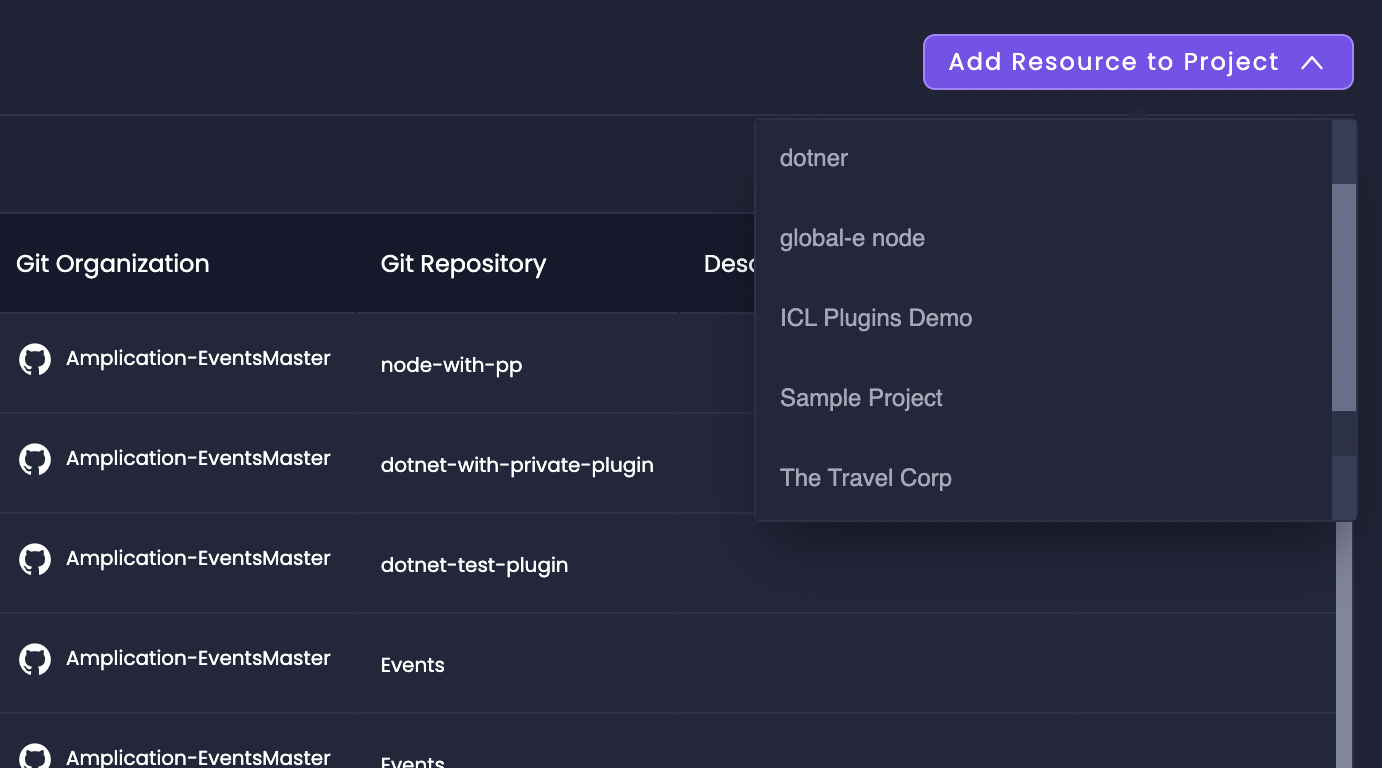
Configuring Your New Resource
Once you’re on the Create a new resource in the catalog page, you’ll configure the details for your new service:Project and Template Selection
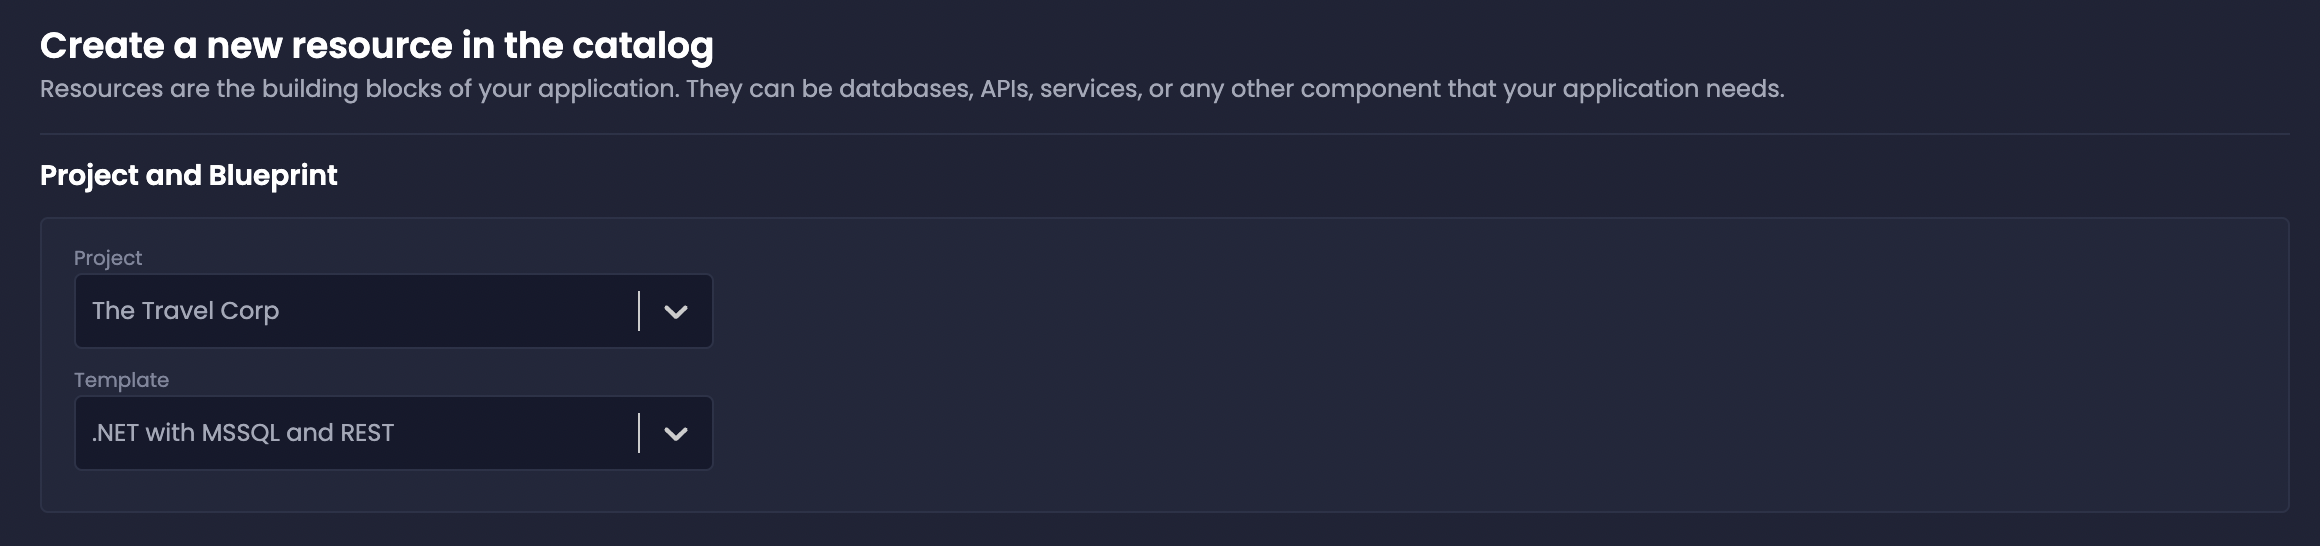
You’ll see two dropdown menus: template and blueprint.
Select the new template from the dropdown. You can choose from templates created from either existing services or blueprints.
Resource Details
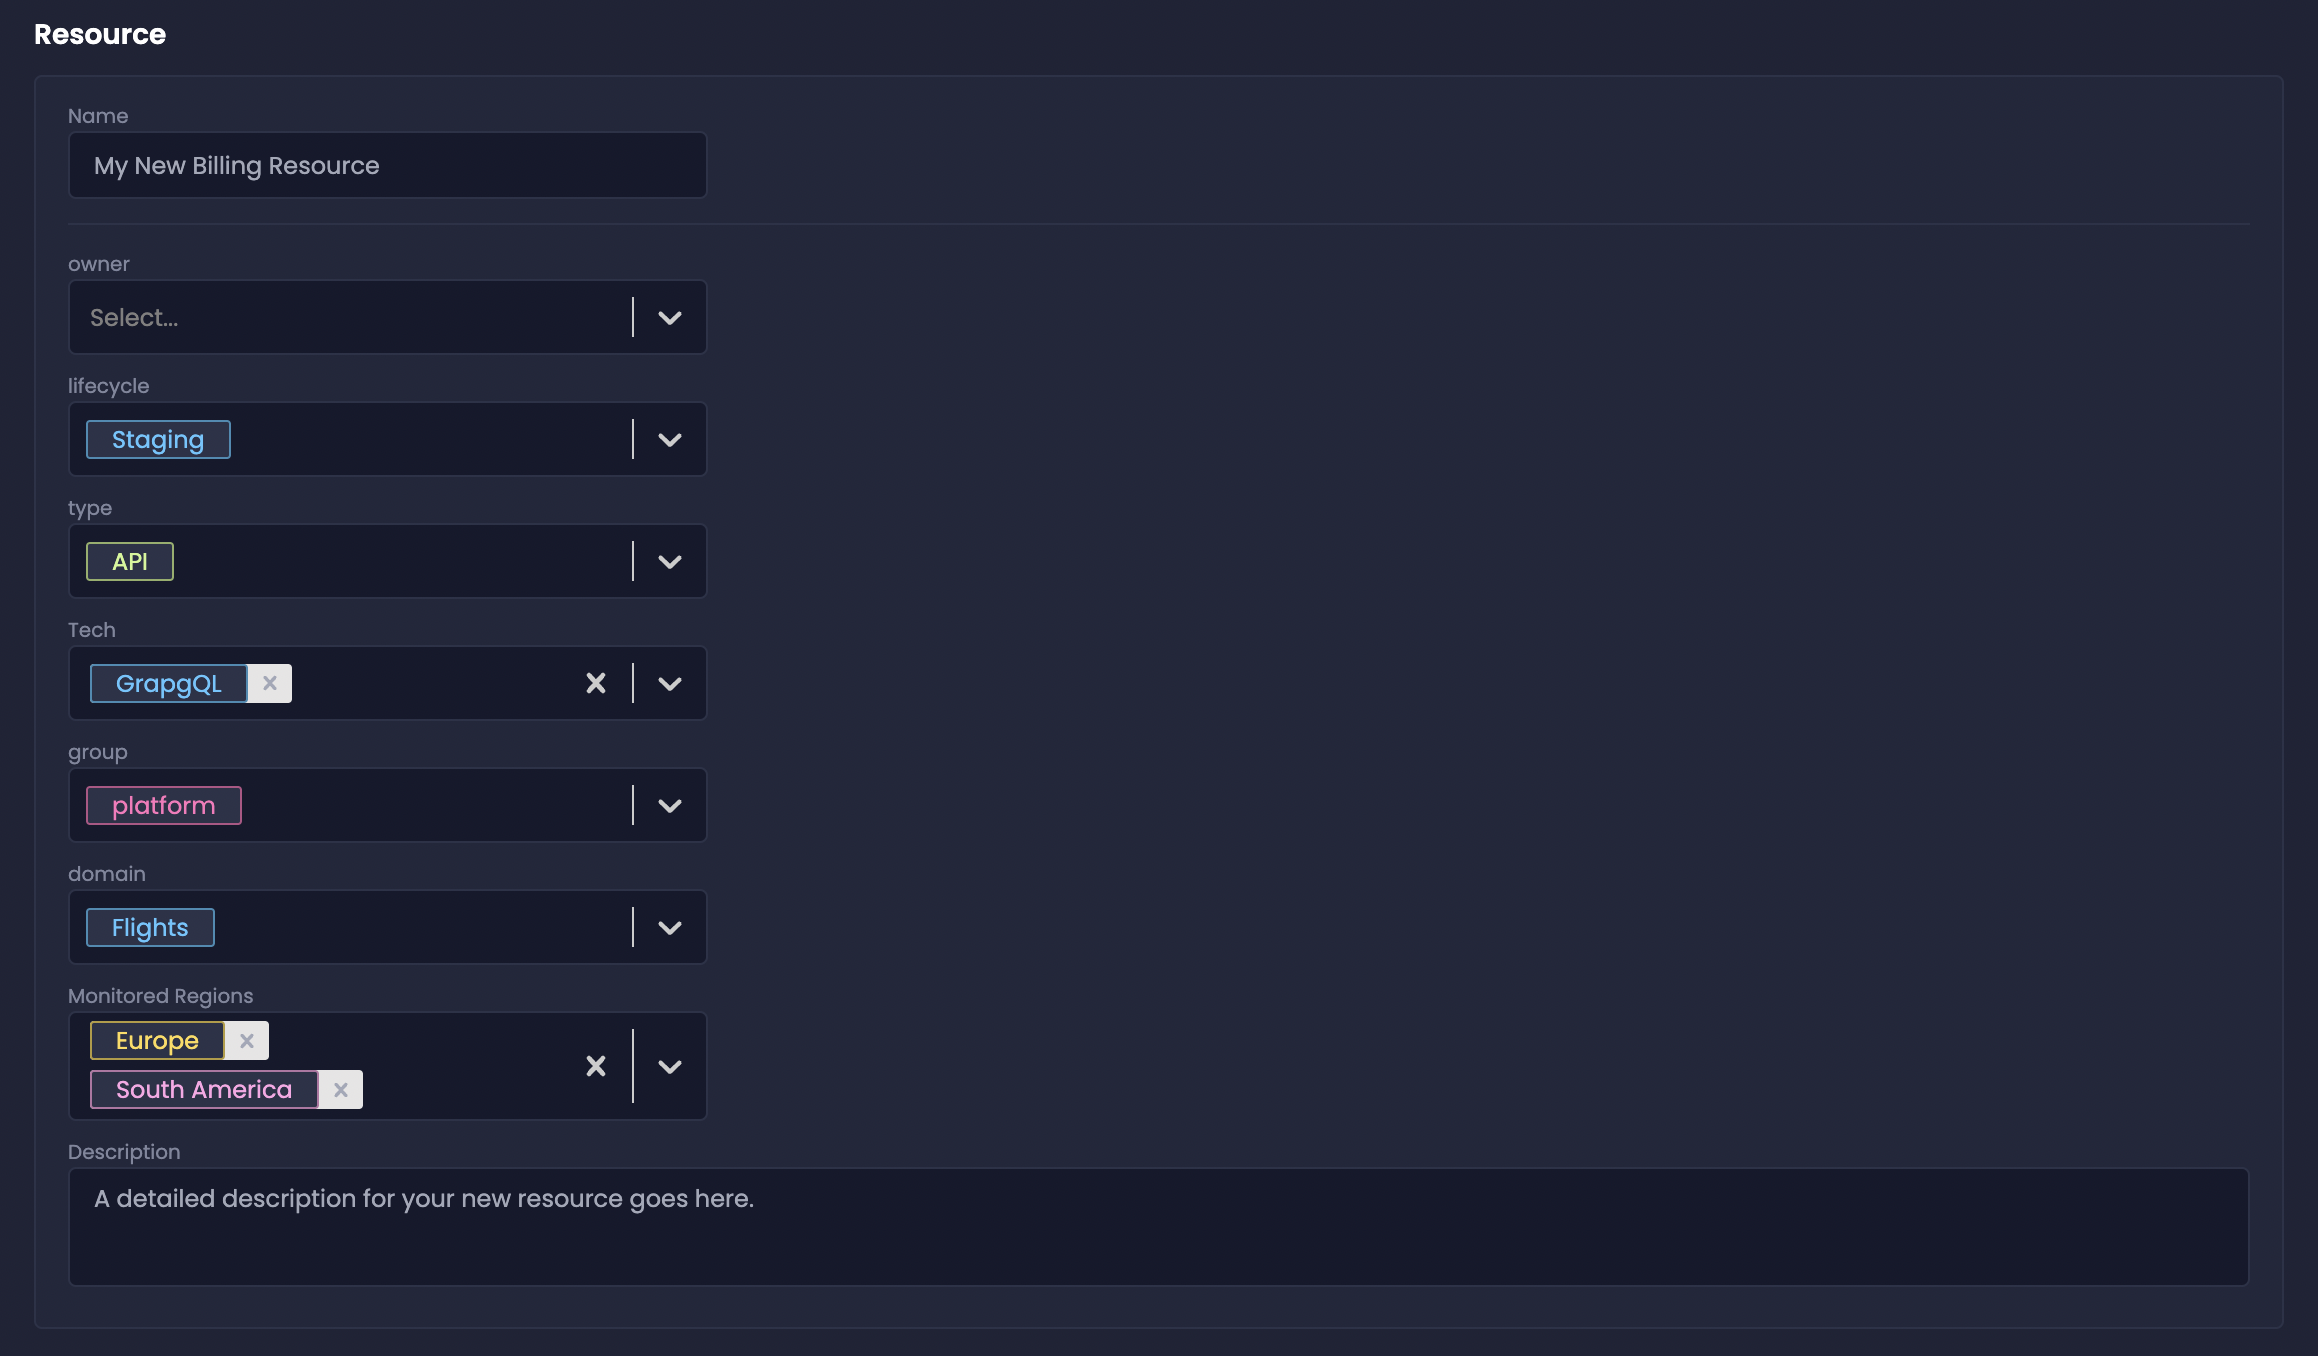
In the Resource section, provide the following information:
- Name: Give your new resource a descriptive name (e.g., “OrderProcessingService”).
- Description: Add a brief description for the resource.
- Catalog Properties: Your platform team may have defined specific catalog properties to help organize and categorize resources. Fill in the required and any relevant optional properties. These might include things like “Tech,” “Type,” “Domain,” and “Lifecycle.”
Learn more about how catalog properties help organize your resources in the Catalog Properties page.
Git Repository Settings
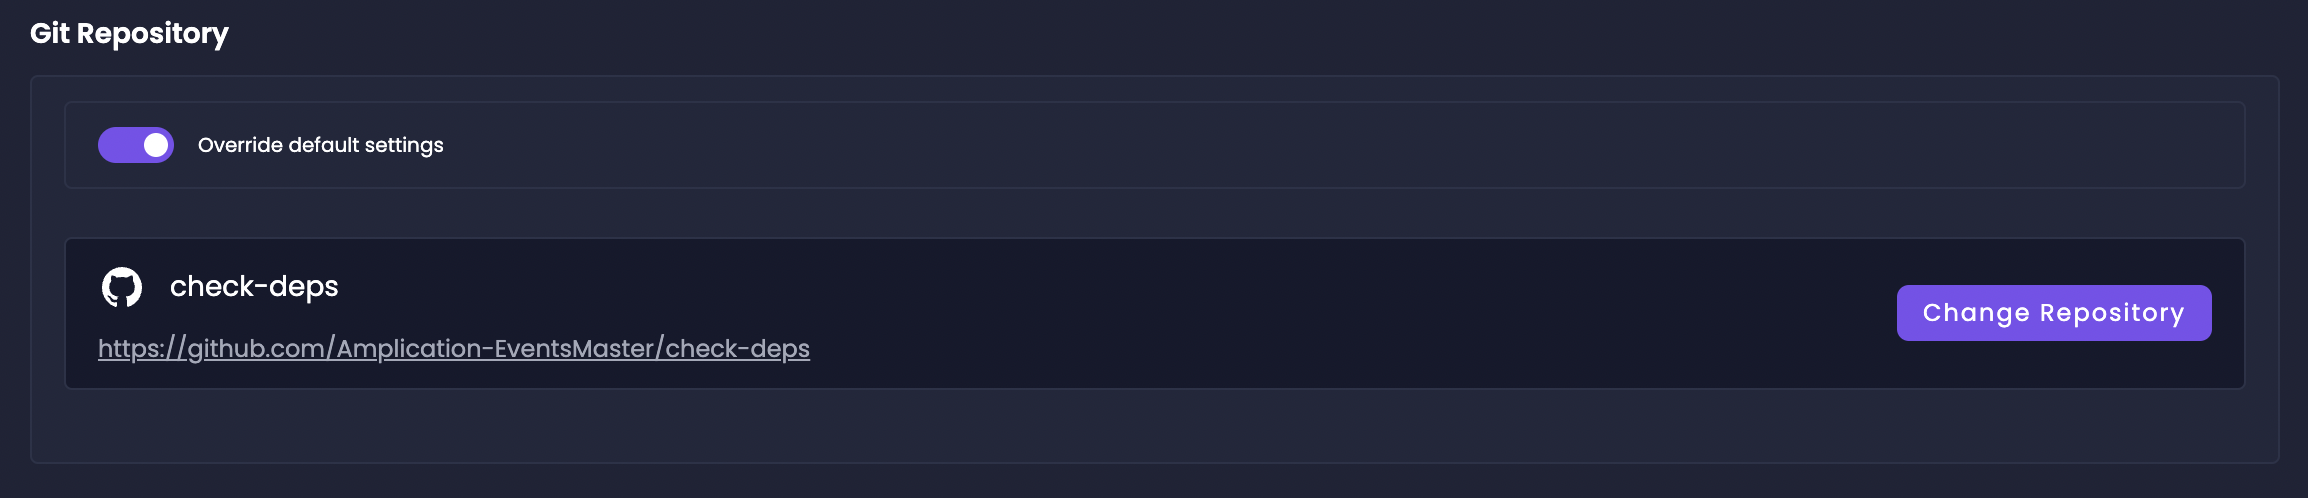
By default, your new resource will be associated with the default Git repository configured for the project.
If you need to use a different repository:
- Click the Override Default Settings slider.
- Select the desired Git organization.
- Choose the specific repository you want to associate with this resource.
When you create a new Amplication project you can choose to give it a default git repo.
That repo will be used for all new resources creating in that project, but it can you can override it.
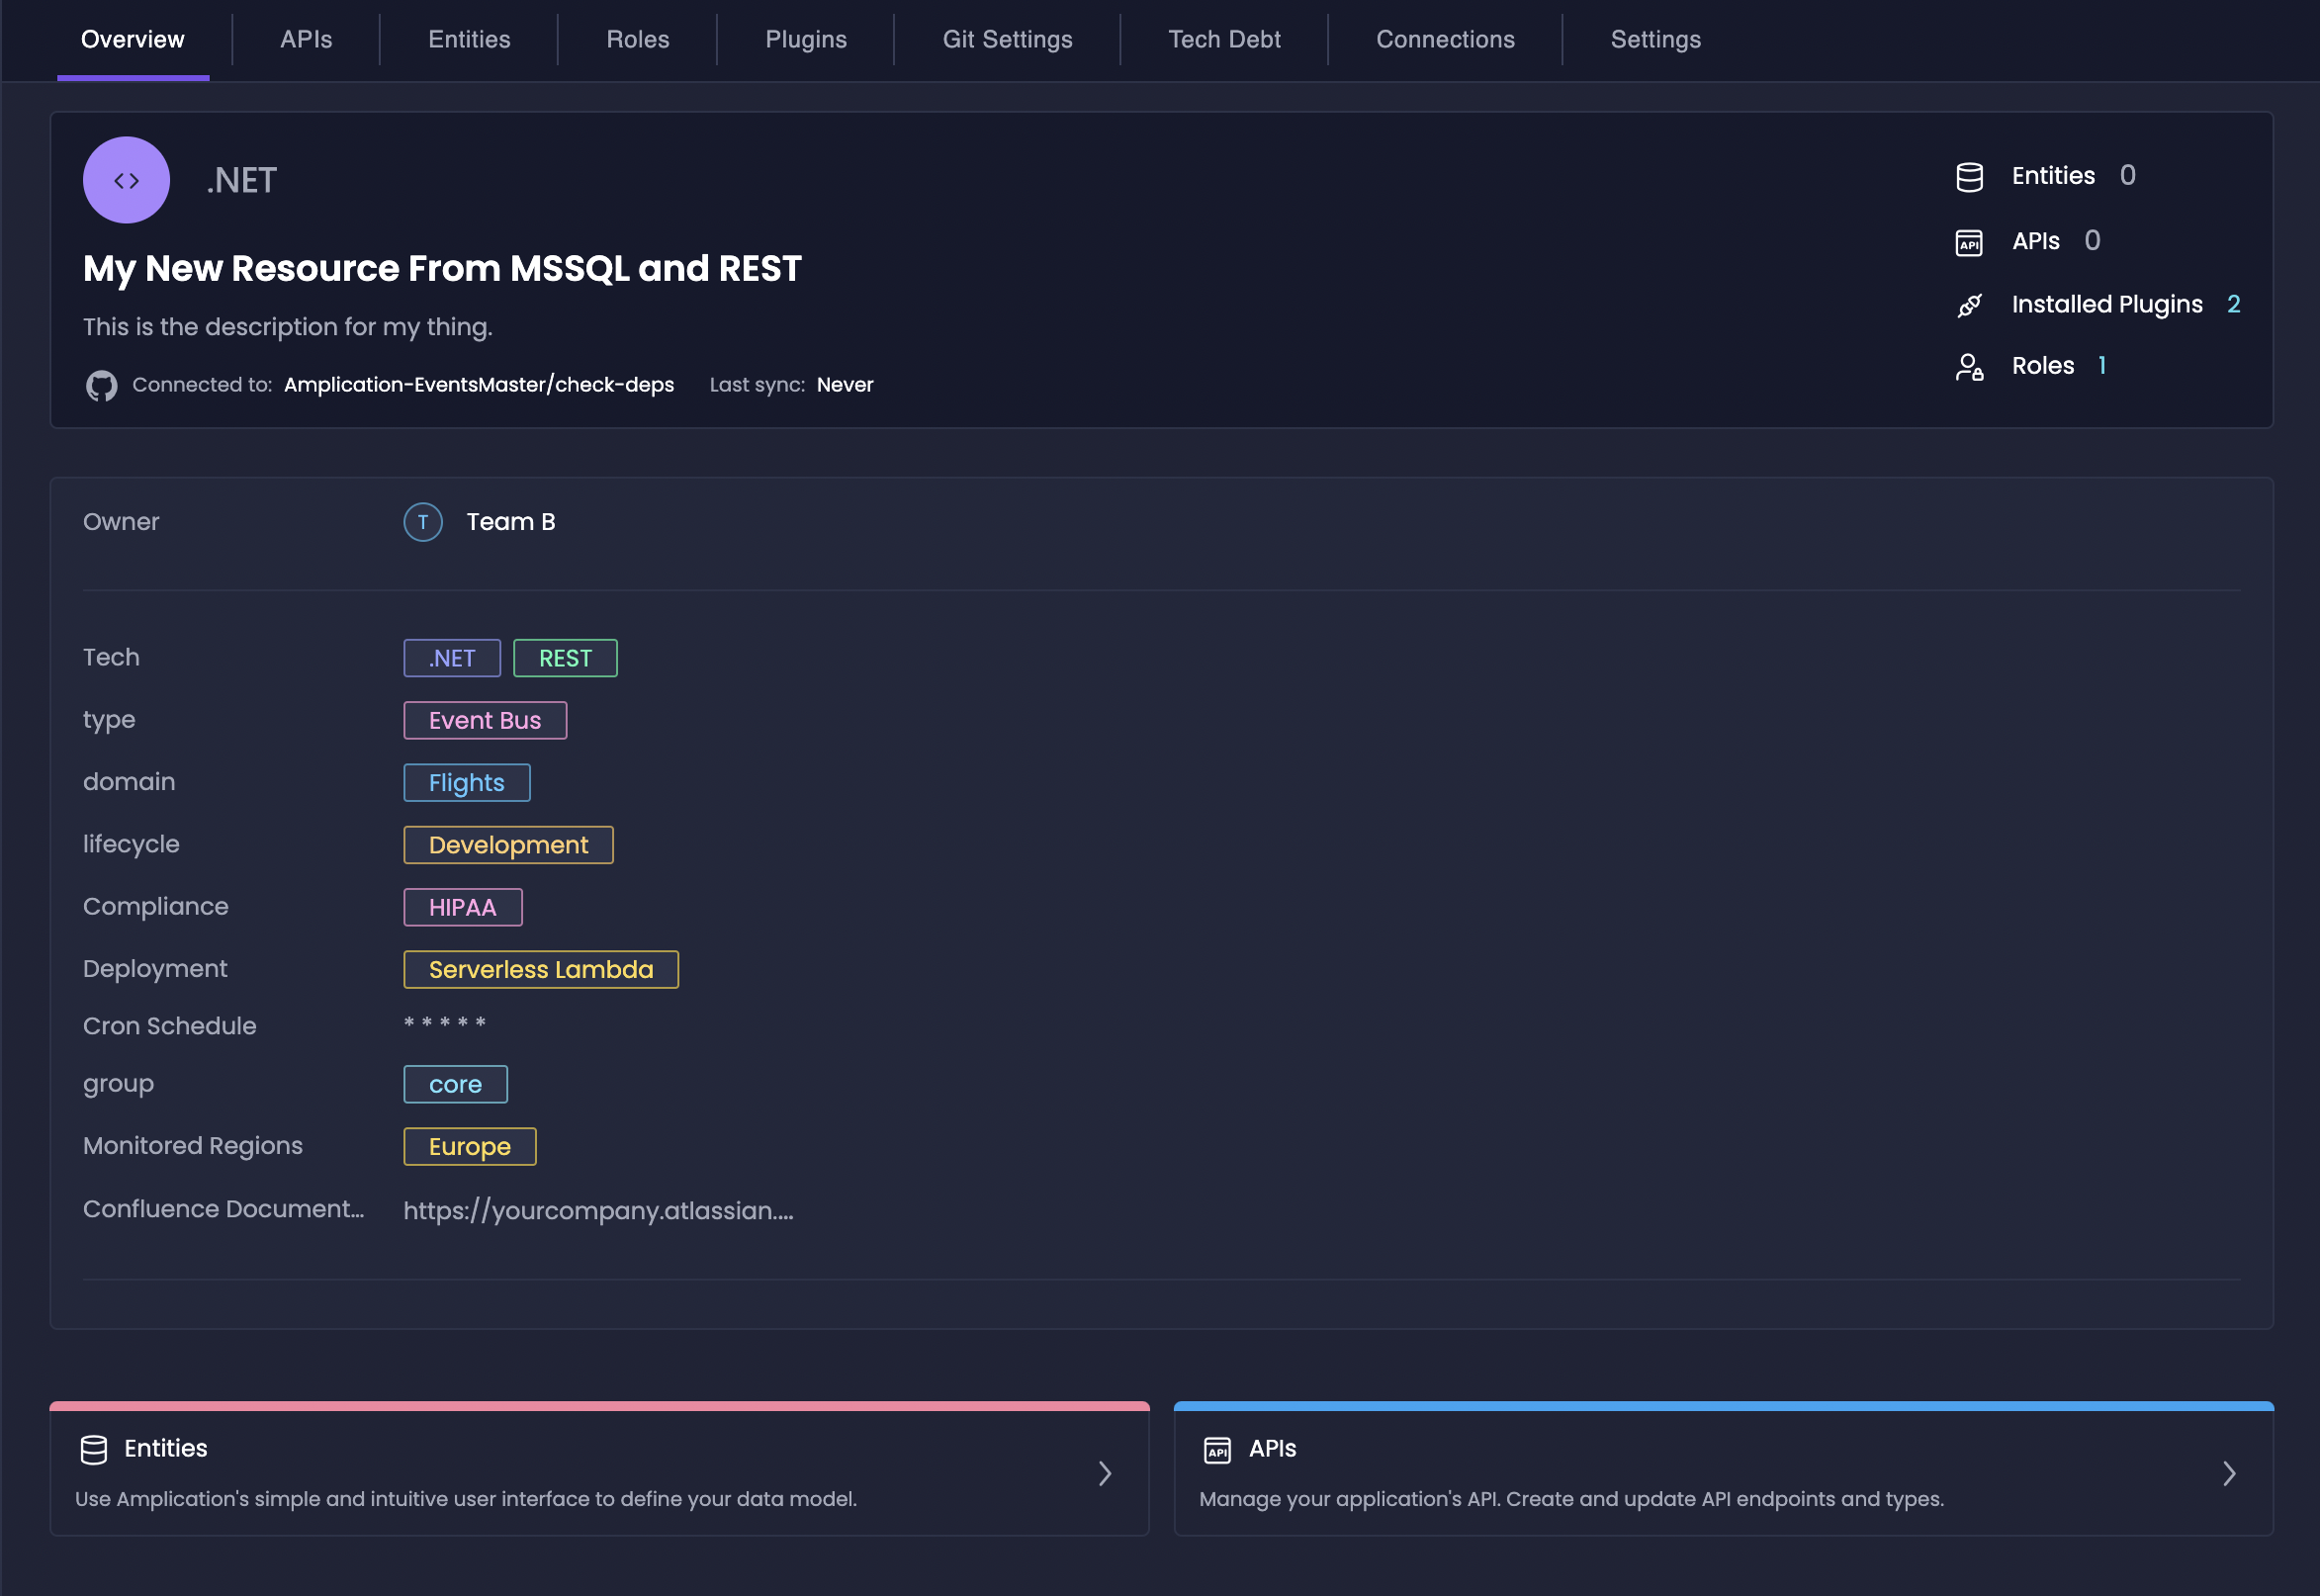
Exploring Your New Resource
After creating your resource from a template, the functionality and content available will depend on the type of your specific resource. You may see some or all of the following tabs:Check out our detailed guide on Live Templates to
understand templates and how they help your organization.
Overview
APIs
The APIs tab allows you to define the APIs for your service by adding actions and DTOs. This tab is available when the template is based on a service.For a detailed understanding of how to define your service’s API, visit the
Custom Types and Actions page.
Entities
In the Entities tab, you can create and manage your data models, including defining fields, relationships, and more. This tab is available when the template is based on a service.Roles
The Roles tab is where you’ll configure user roles and permissions for your resource, controlling access to different parts of your application. This tab is available when the template is based on a service.Plugins
The Plugins tab provides access to a catalog of public and private plugins. You can install plugins to extend the functionality of your resource, with available plugins depending on the underlying technology (.NET or Node.js) if the template is service-based.Visit the Activate Public Catalog Plugins page to
learn more about installing plugins in your resource.
Git Settings
Use the Git Settings tab to review or override the default Git repository settings that were configured when the resource was created.Tech Debt
The Tech Debt tab displays alerts and updates related to your resource, including updates to plugins or the template it was created from.Learn more about how to manage technical debt in the Technical Debt
Management documentation.