Documentation Index
Fetch the complete documentation index at: https://docs.amplication.com/llms.txt
Use this file to discover all available pages before exploring further.
Public vs Private Plugins
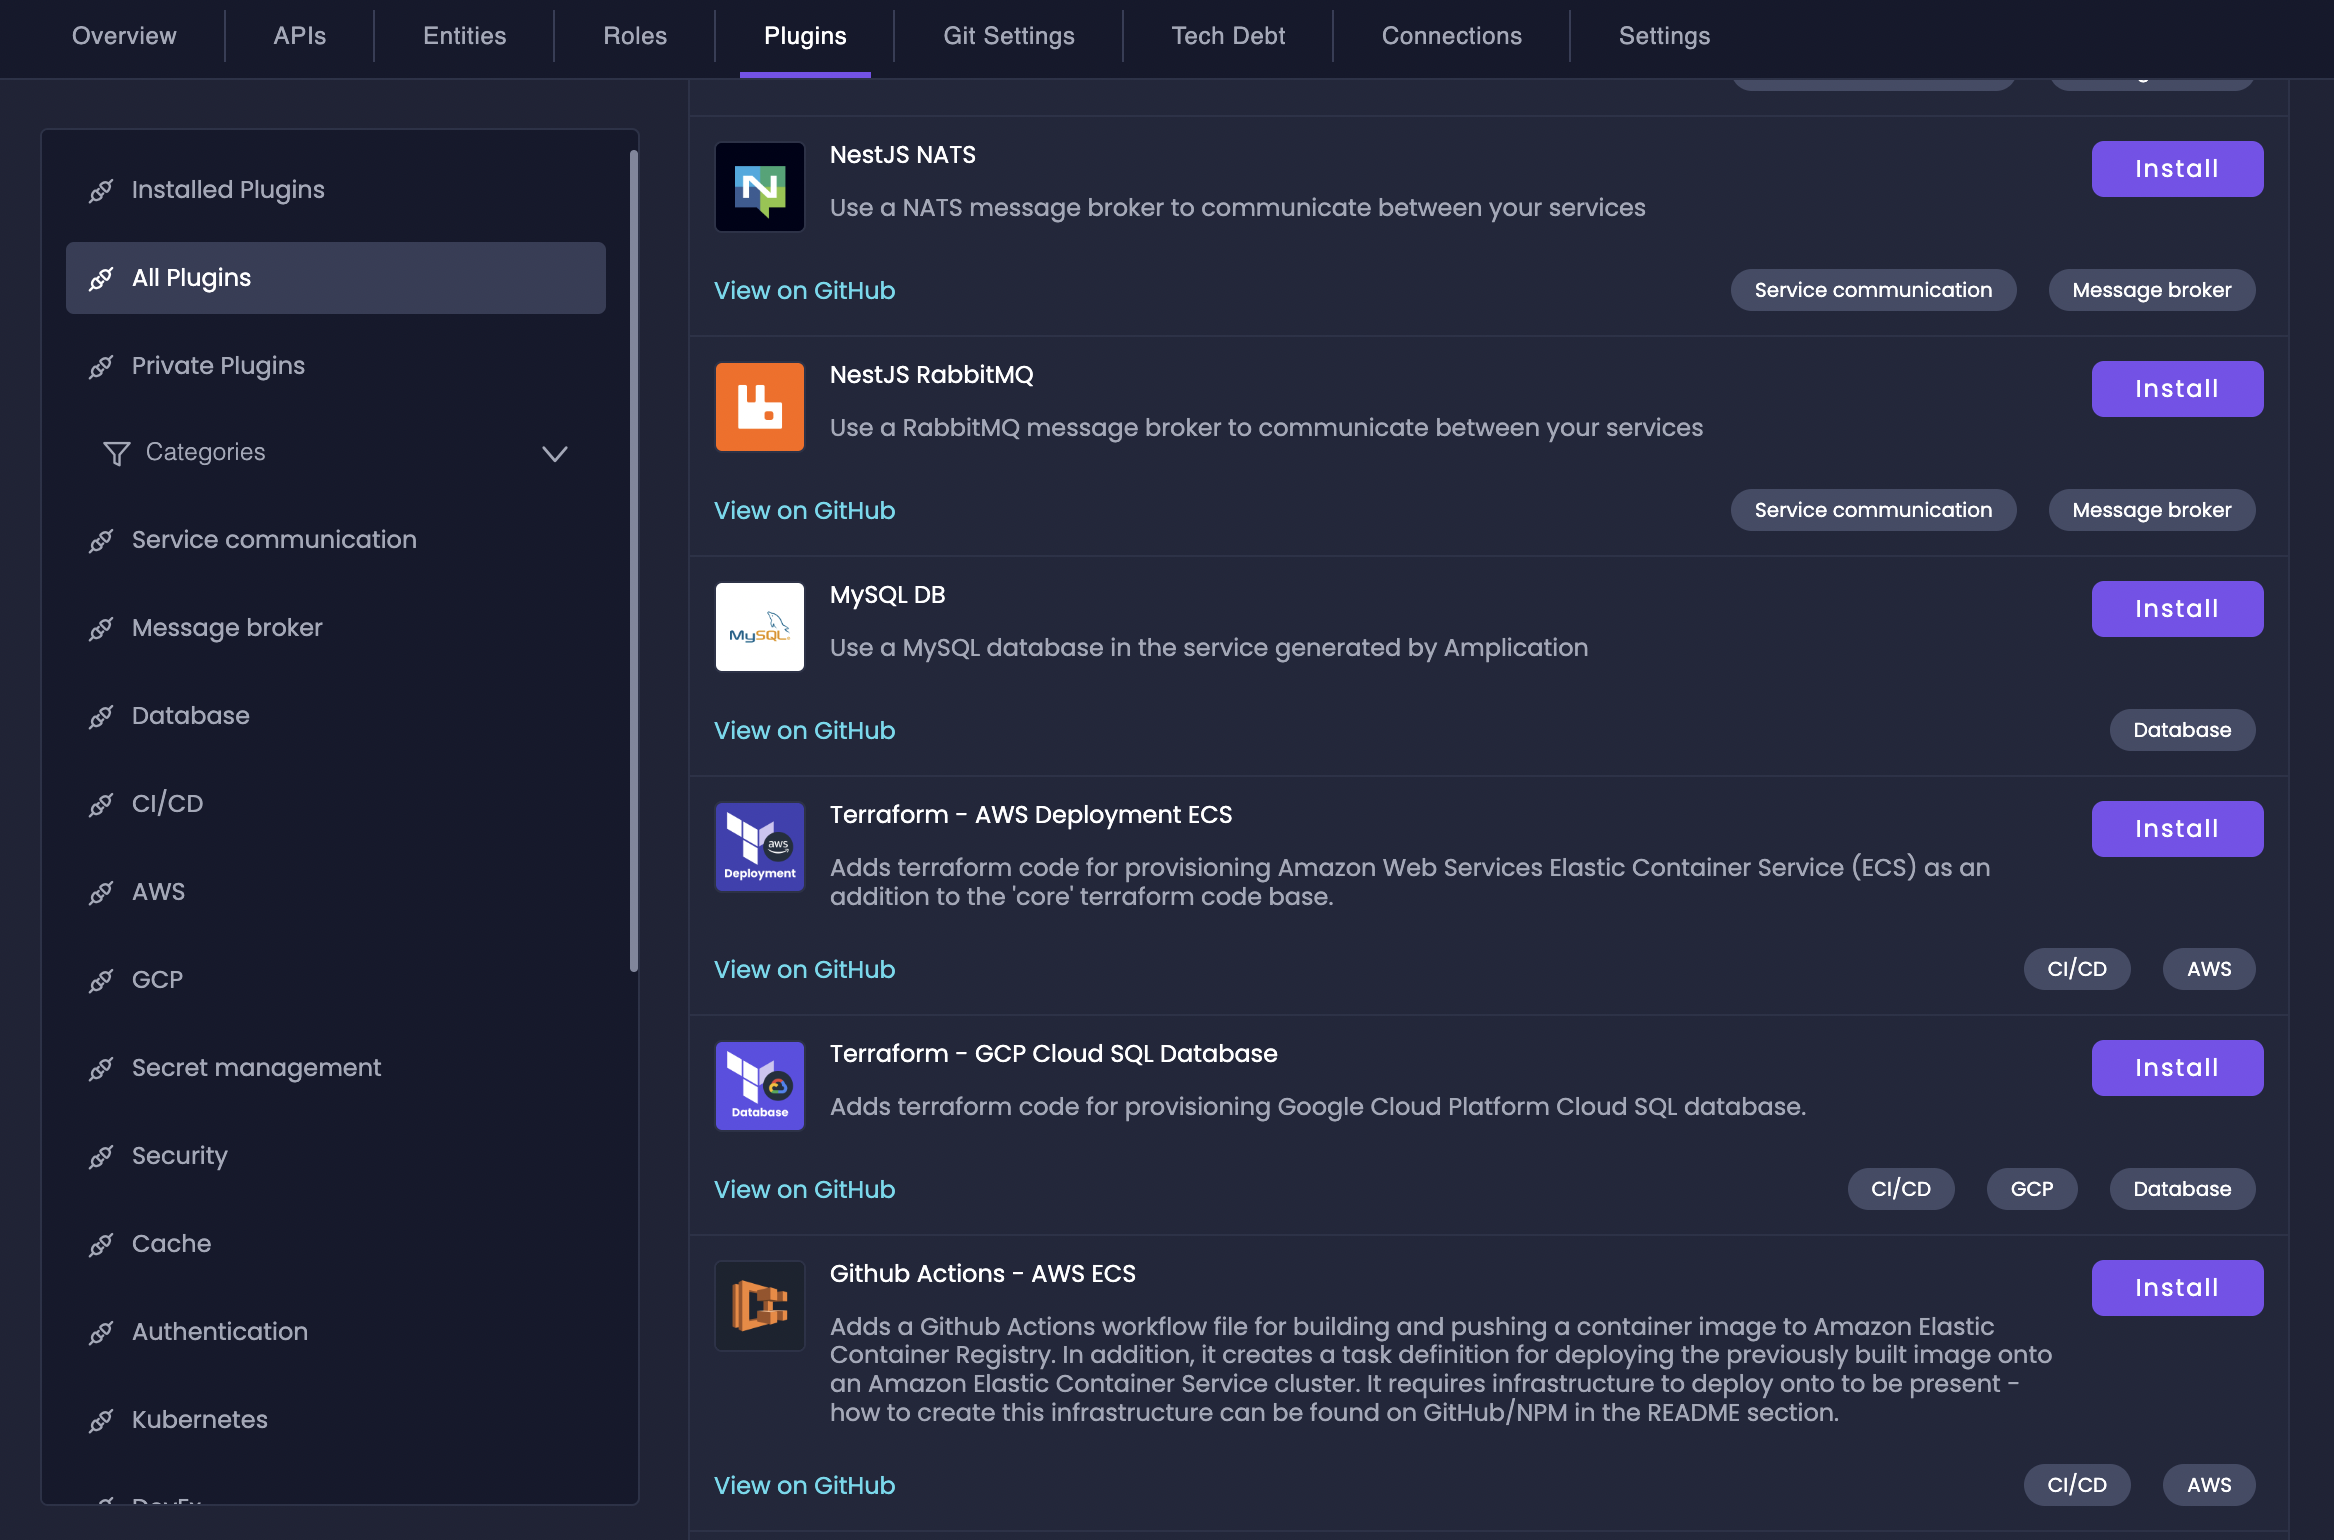
Amplication supports two types of plugins, giving you flexibility and control: Public Plugins are community-developed and Amplication-maintained plugins, available to all users. They cover a wide range of common backend functionalities and are a great way to quickly extend your service. Think of them as the “app store” for your backend. They are open-source, so you can always inspect the code and understand exactly what they do. With public plugins, you can effortlessly add features like:- Database Integrations (PostgreSQL, MongoDB, MySQL)
- Authentication & Authorization
- API Enhancements (GraphQL, Swagger/OpenAPI, rate limiting)
- Observability (logging, monitoring, tracing)
- CI/CD Pipelines
- Code Quality Tools (Prettier, ESLint)
Public catalog plugins are only available when using Amplication standards with the Node.js or .NET blueprints. For a full list of publicly available plugins, see Amplication’s Plugin repo on GitHub.
Learn more about creating and managing private plugins in our Private Plugins Guide.
Add a Plugin to Your Resource
Choose Plugin Type
Select either:
- All Plugins tab to browse the public plugin catalog or choose specific categories.
- Private Plugins tab to access your organization’s custom plugins

Manage Installed Plugins
Amplication executes plugins and generates code according to their order on the Installed Plugins page. From this page, you can view all your currently installed plugins and manage their configuration.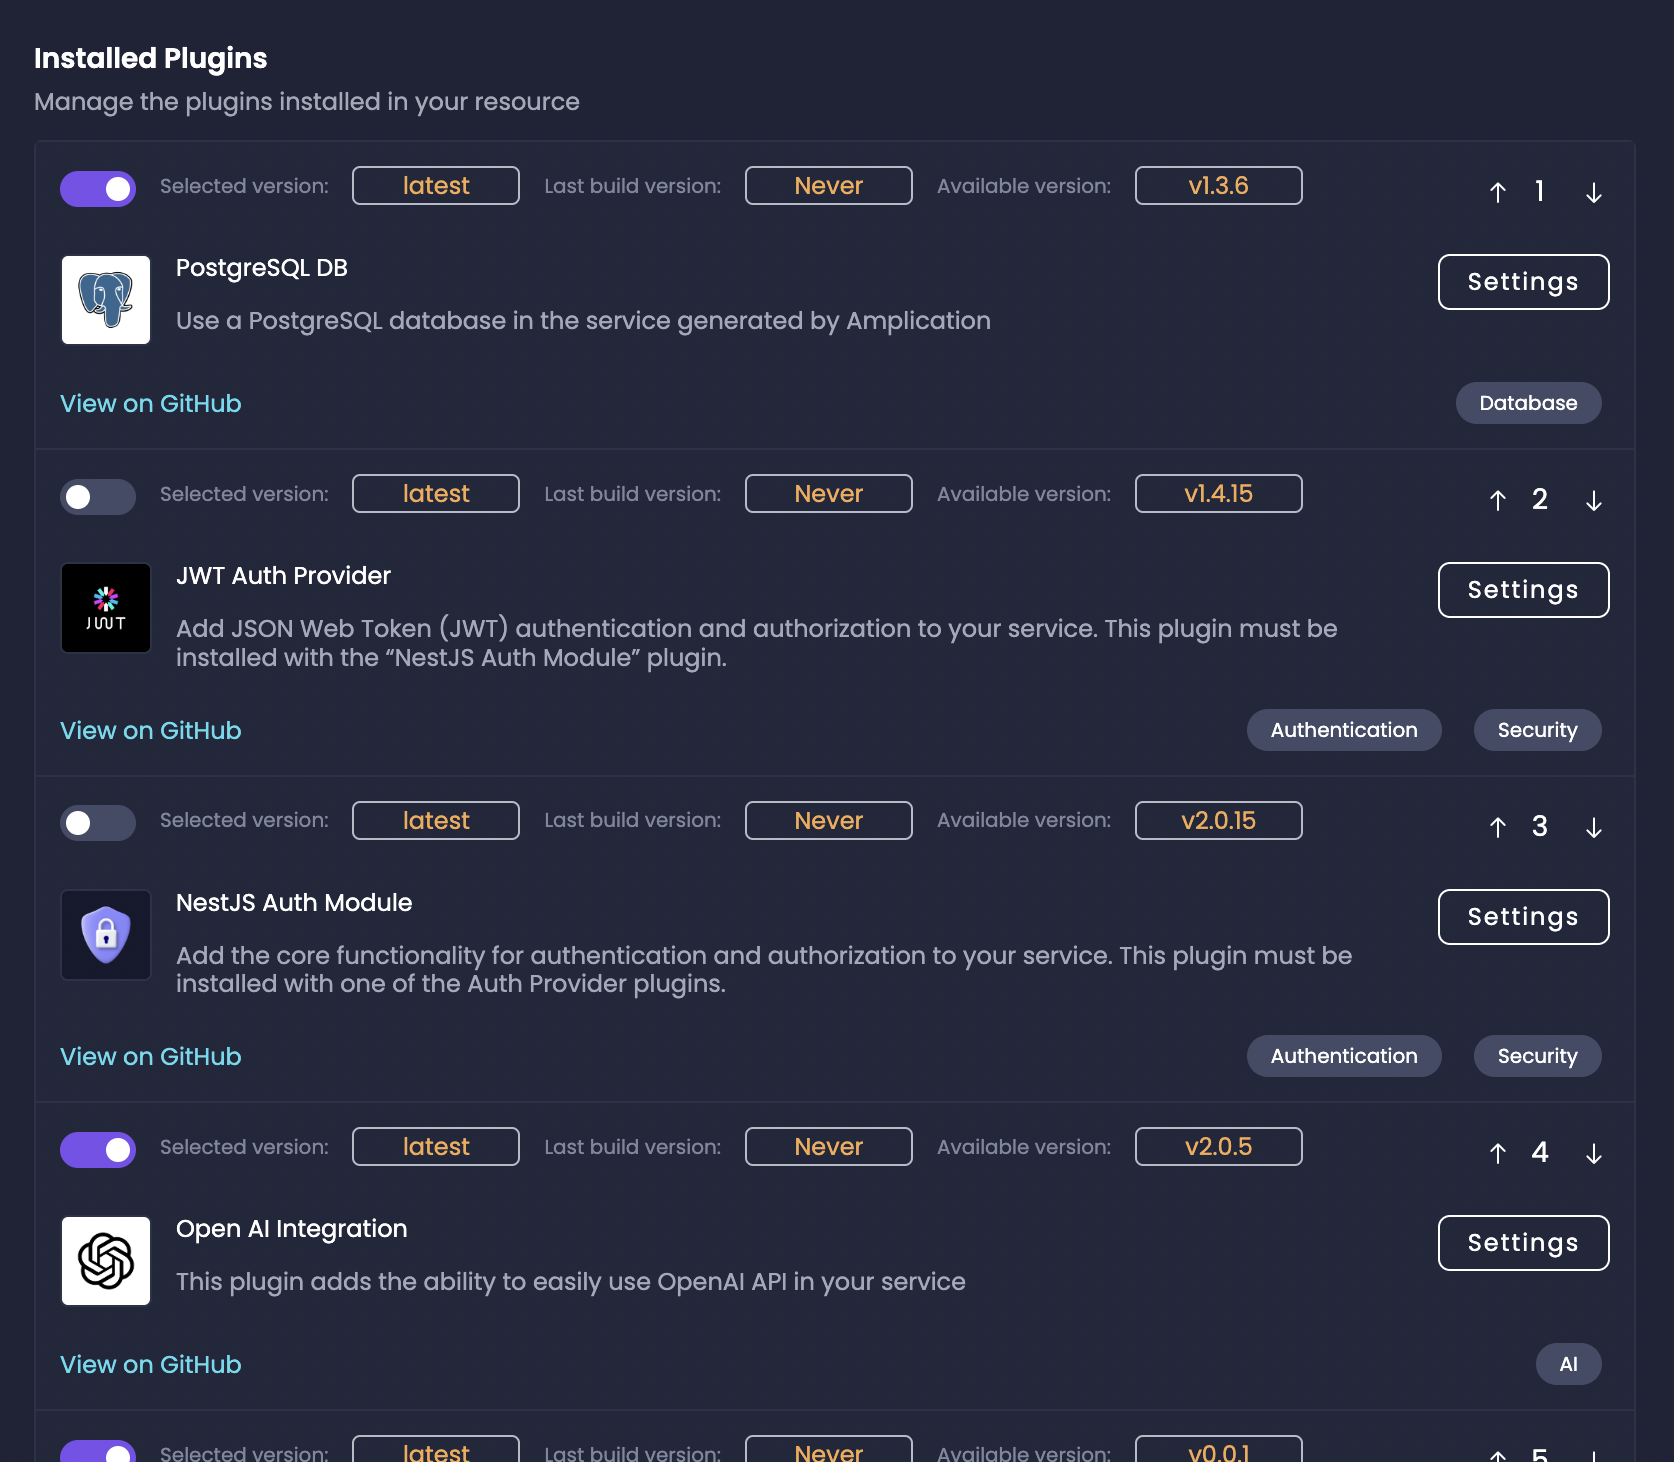
- Enable or disable plugins using the toggle switch
- Click the arrows on the right-hand corner of each plugin to change their execution order
- View basic plugin information like version and last build time
Change Plugin Settings
Each plugin can be configured through its settings page, accessed by clicking the Settings button next to the plugin.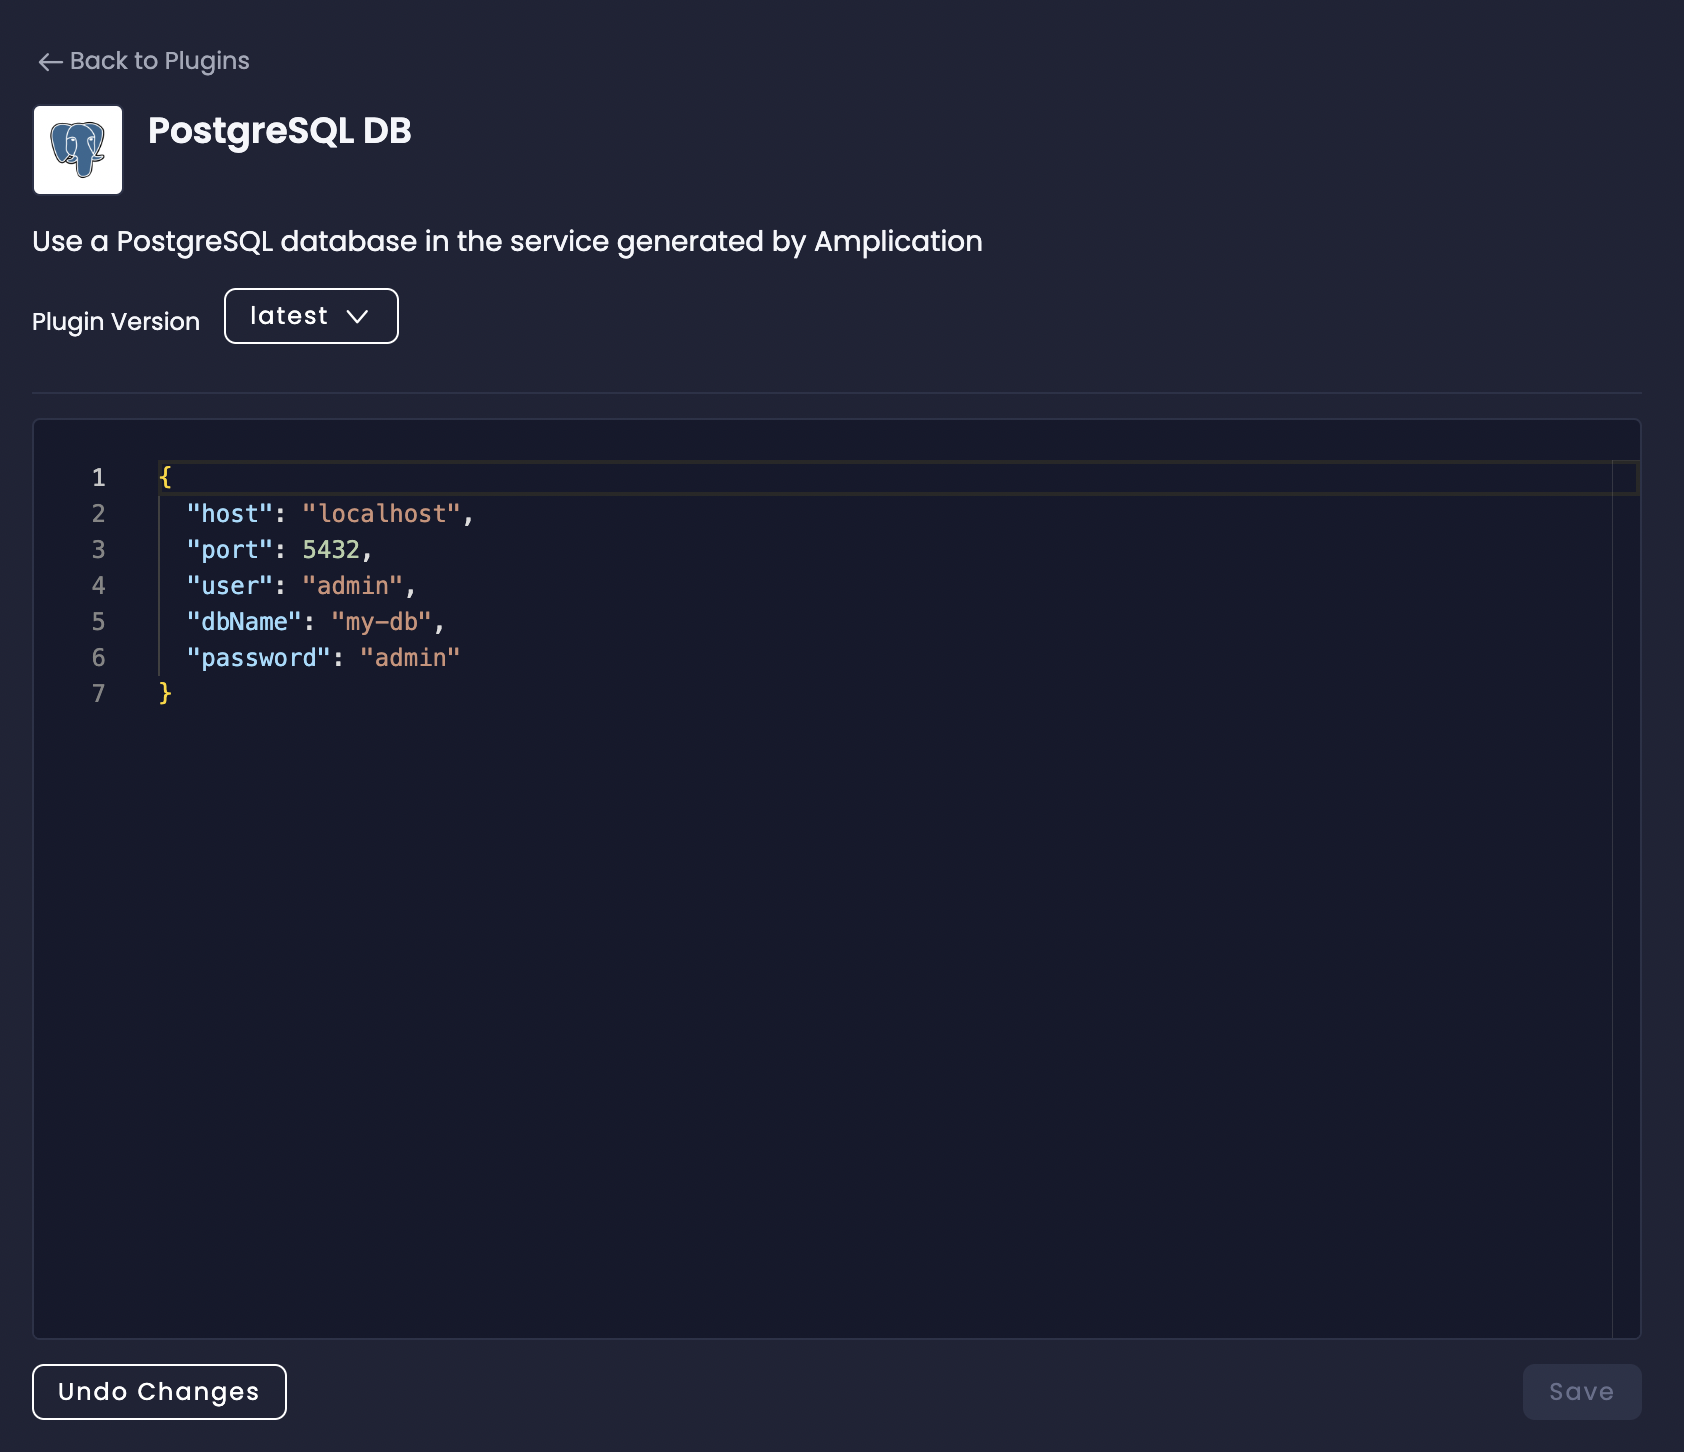
- Each plugin version can have its own specific settings
- Settings are configured using JSON
- Changing versions will reset settings to that version’s defaults
- Visit the plugin’s GitHub repository (linked from the Installed Plugins tab) for detailed configuration documentation
For more information about plugin configuration and publishing, see our Plugin Publishing Guide.
Next Steps
Plugins are a fundamental part of Amplication’s code generation capabilities, available for Node.js, .NET blueprints, and custom blueprints. They can either be public catalog plugins for your specific code generation engine or private plugins specific to your organization.Plugin Development Overview
Learn how to build your own custom plugins
Private Plugins Guide
Understand how to leverage private plugins effectively
Browse Available Public Plugins
View the full catalog of Node.js and .NET plugins
How Plugins Fit Into Amplication
Understand the role of plugins in the Amplication ecosystem