Documentation Index
Fetch the complete documentation index at: https://docs.amplication.com/llms.txt
Use this file to discover all available pages before exploring further.
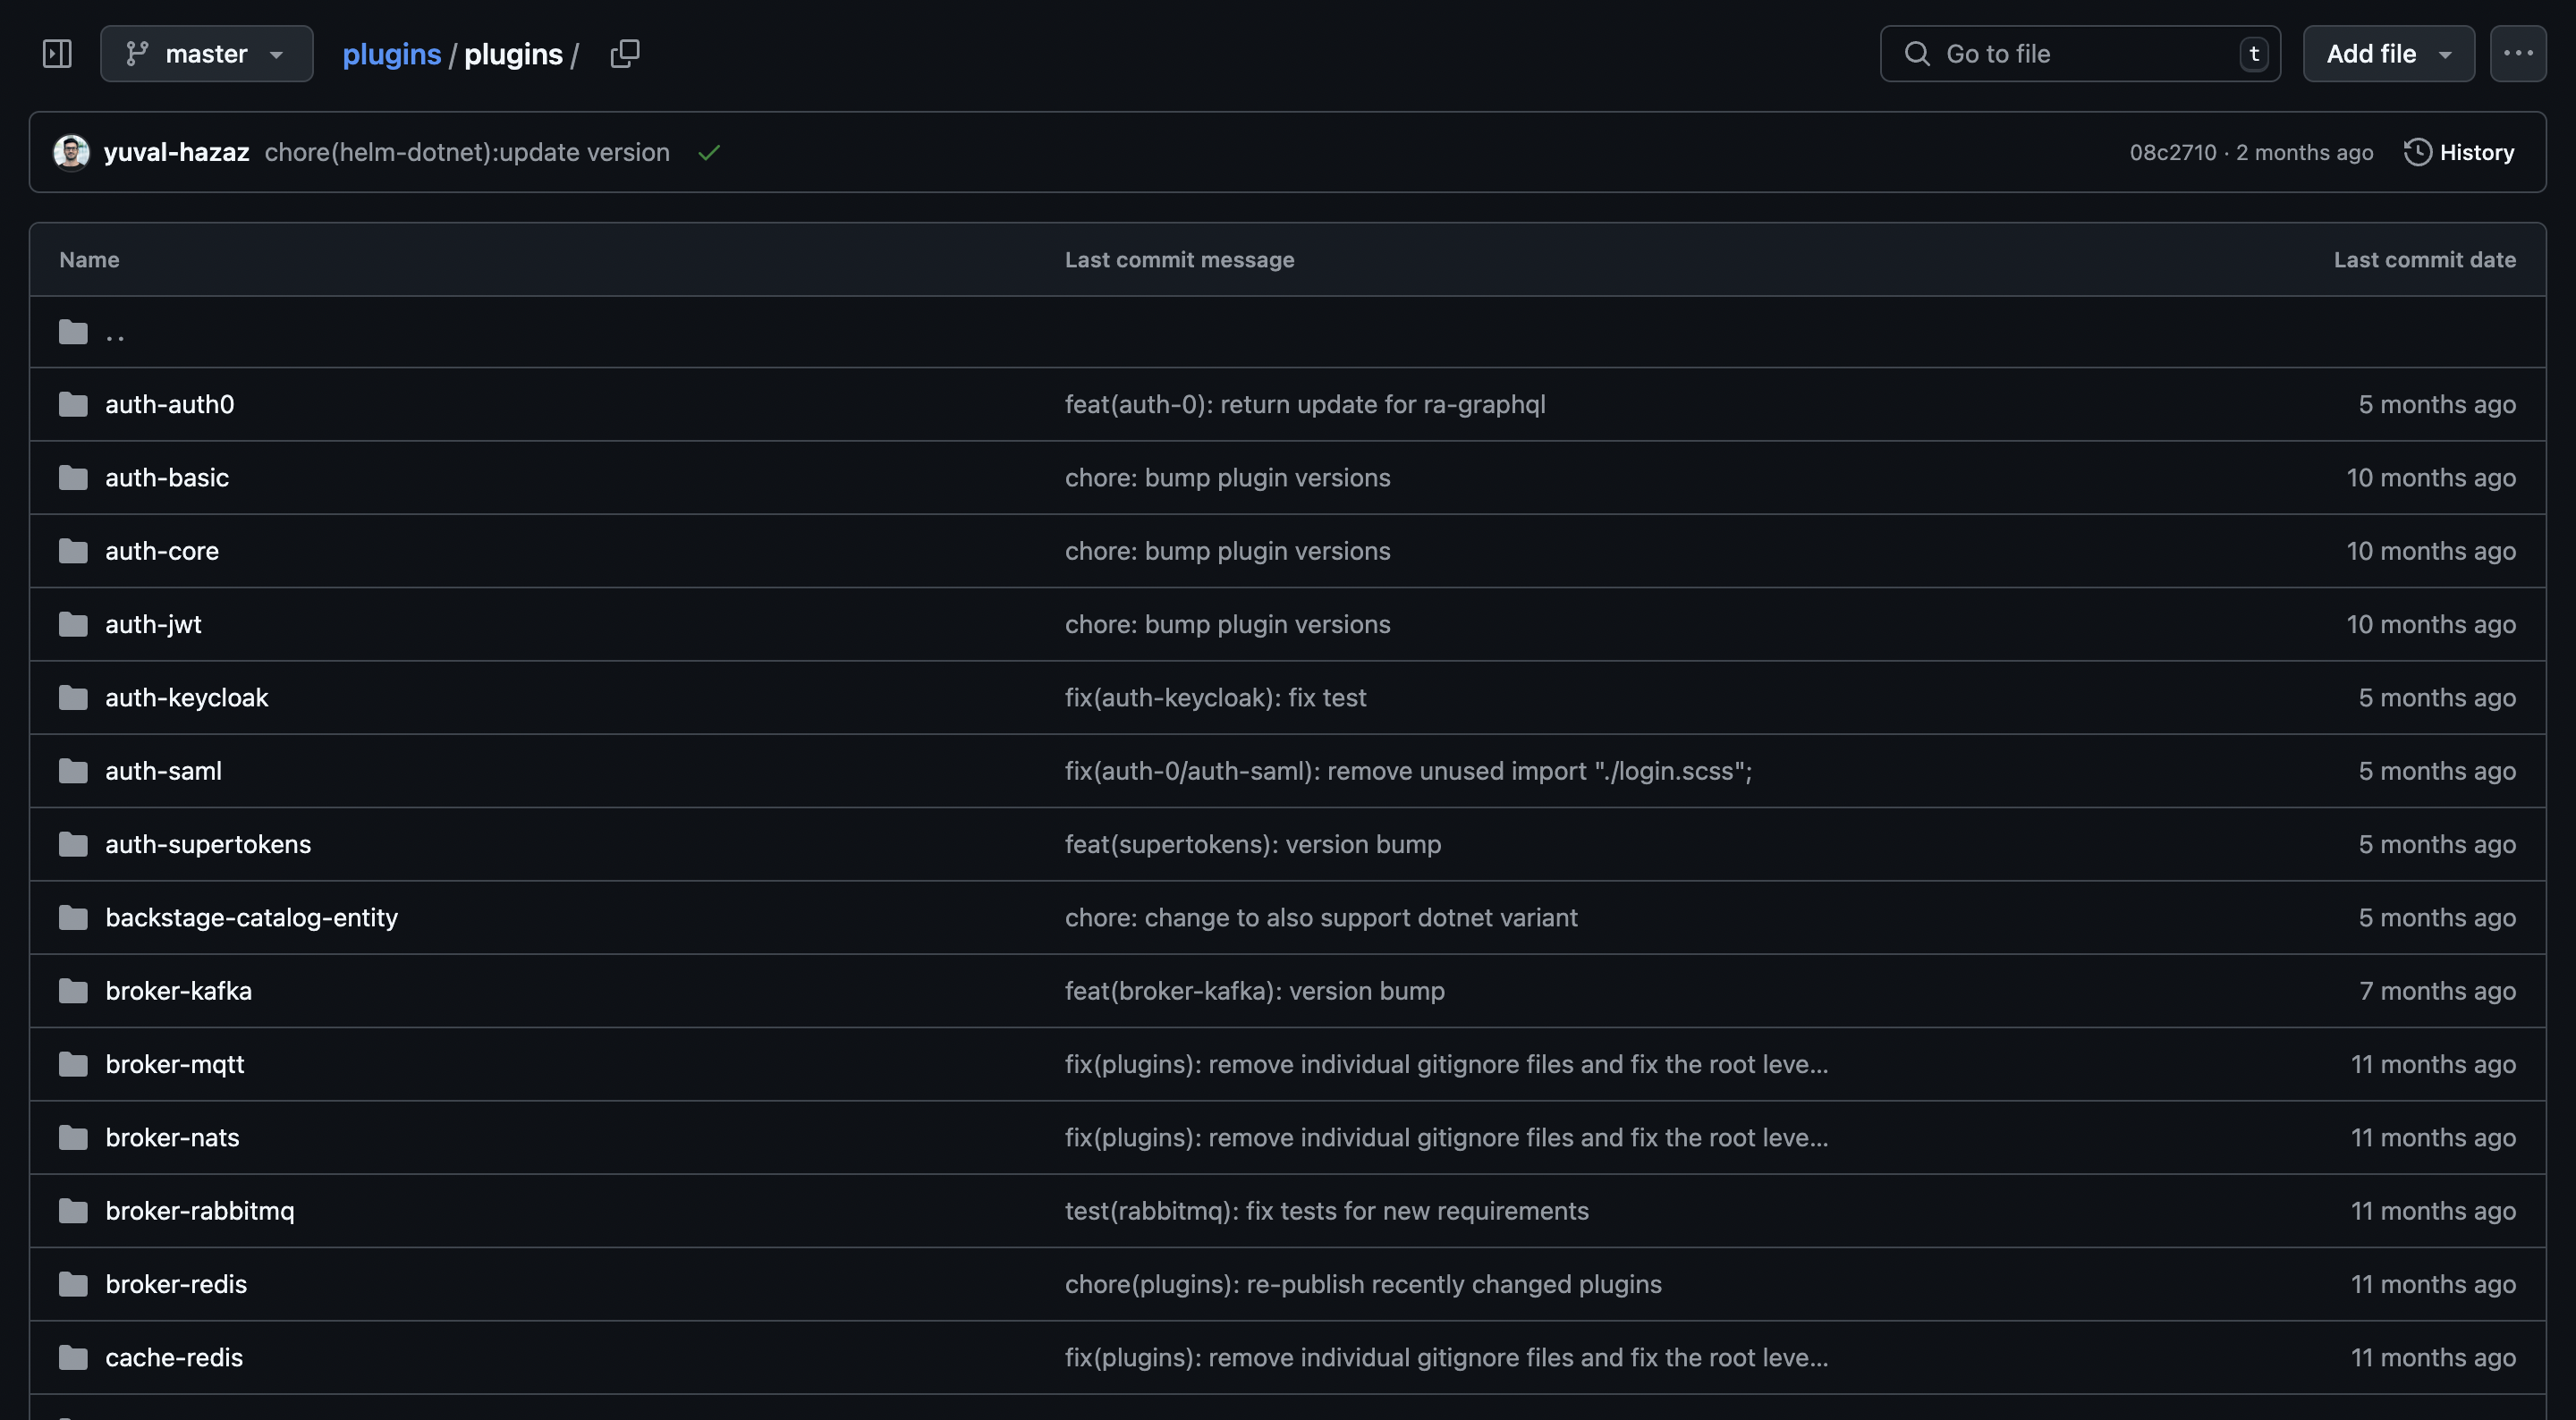
plugins directory, allowing Amplication to detect and manage your organization’s private plugins.
Step 1: Create Your Private Plugins Git Repository
Create a New Git Repository
Create a new, empty Git repository dedicated to housing your private plugins.
Amplication detects available plugins by searching for individual folders
within the
plugins directory. Each plugin folder name serves as the plugin’s
unique identifier and must use kebab-case (e.g., company-auth-plugin). This
folder structure is required for Amplication to recognize and add your plugins
to the UI.Step 2: Set Up Your Plugin Folder
- Node.js Plugin
- .NET Plugin
Clone the official template into your plugins directory:Replace Before committing & pushing your new plugin to git, you need to build the plugin’s assets:
your-plugin-id with your chosen plugin identifier (e.g., company-auth-plugin).This command clones our official Node.js plugin
template, which is the
recommended starting point for creating Node.js plugins.
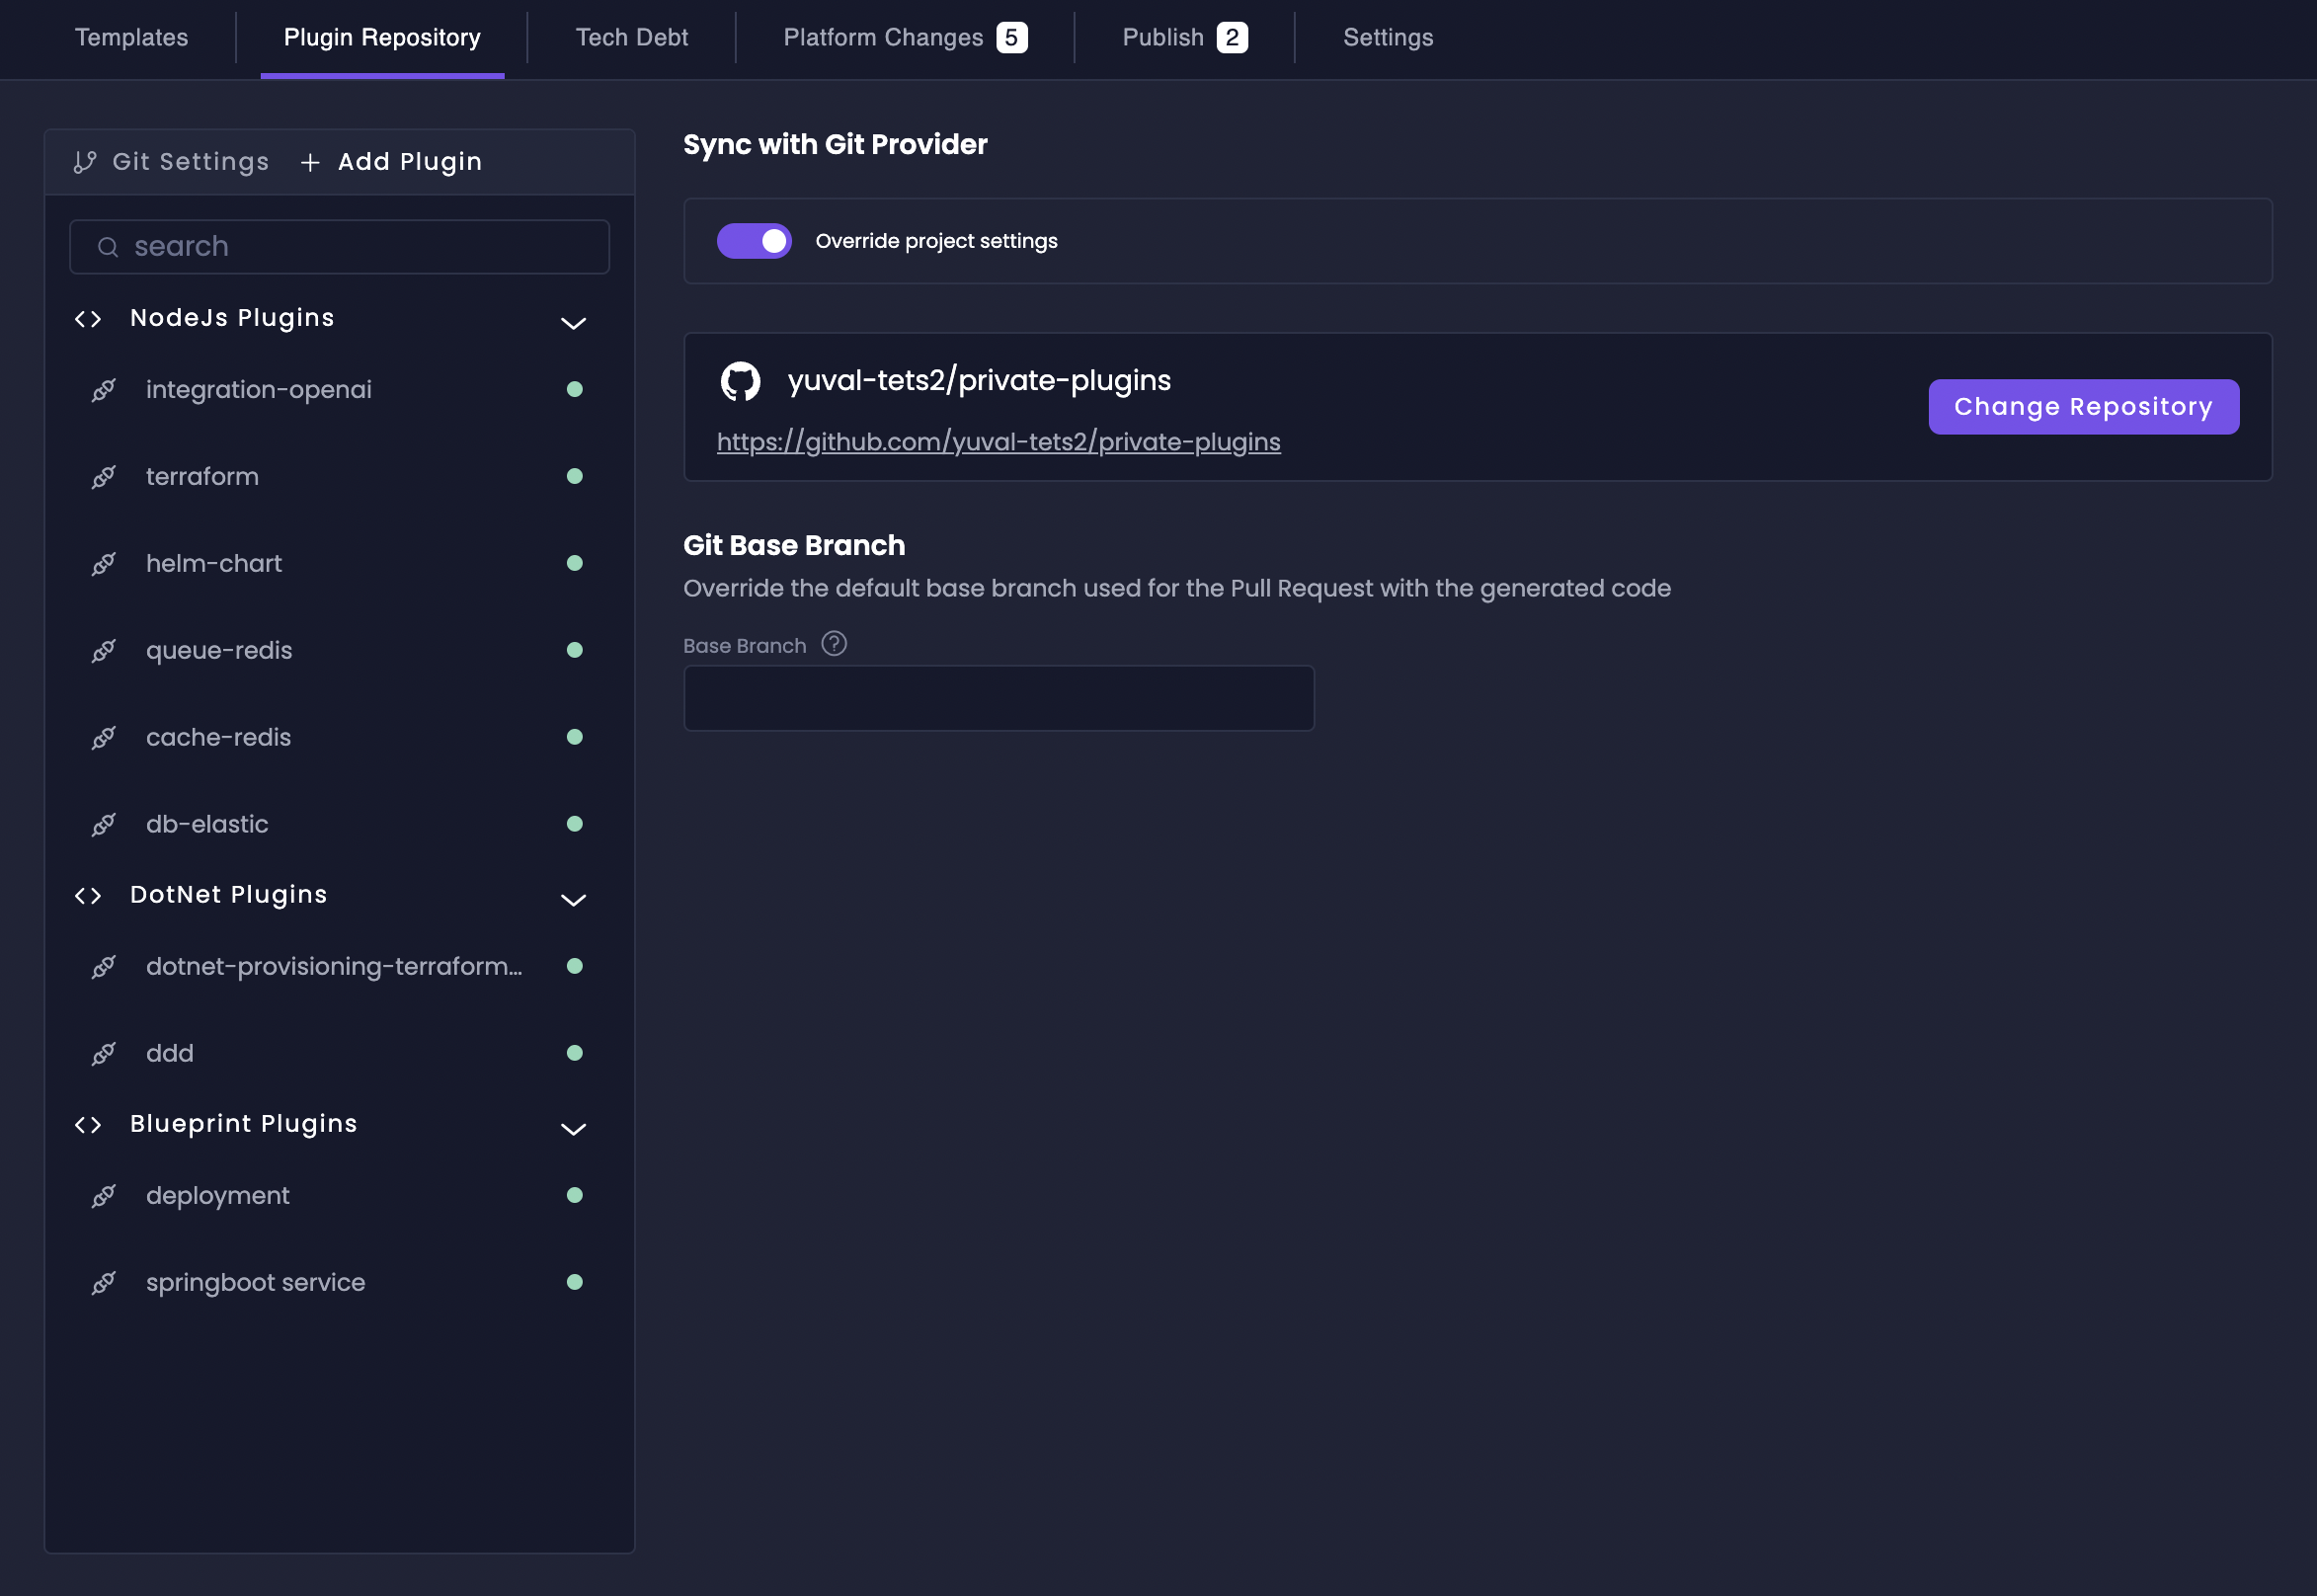
Step 3: Connect Your Repository in Amplication
Access Plugin Repository
Navigate to your project and click on Plugin Repository in the Platform Console.
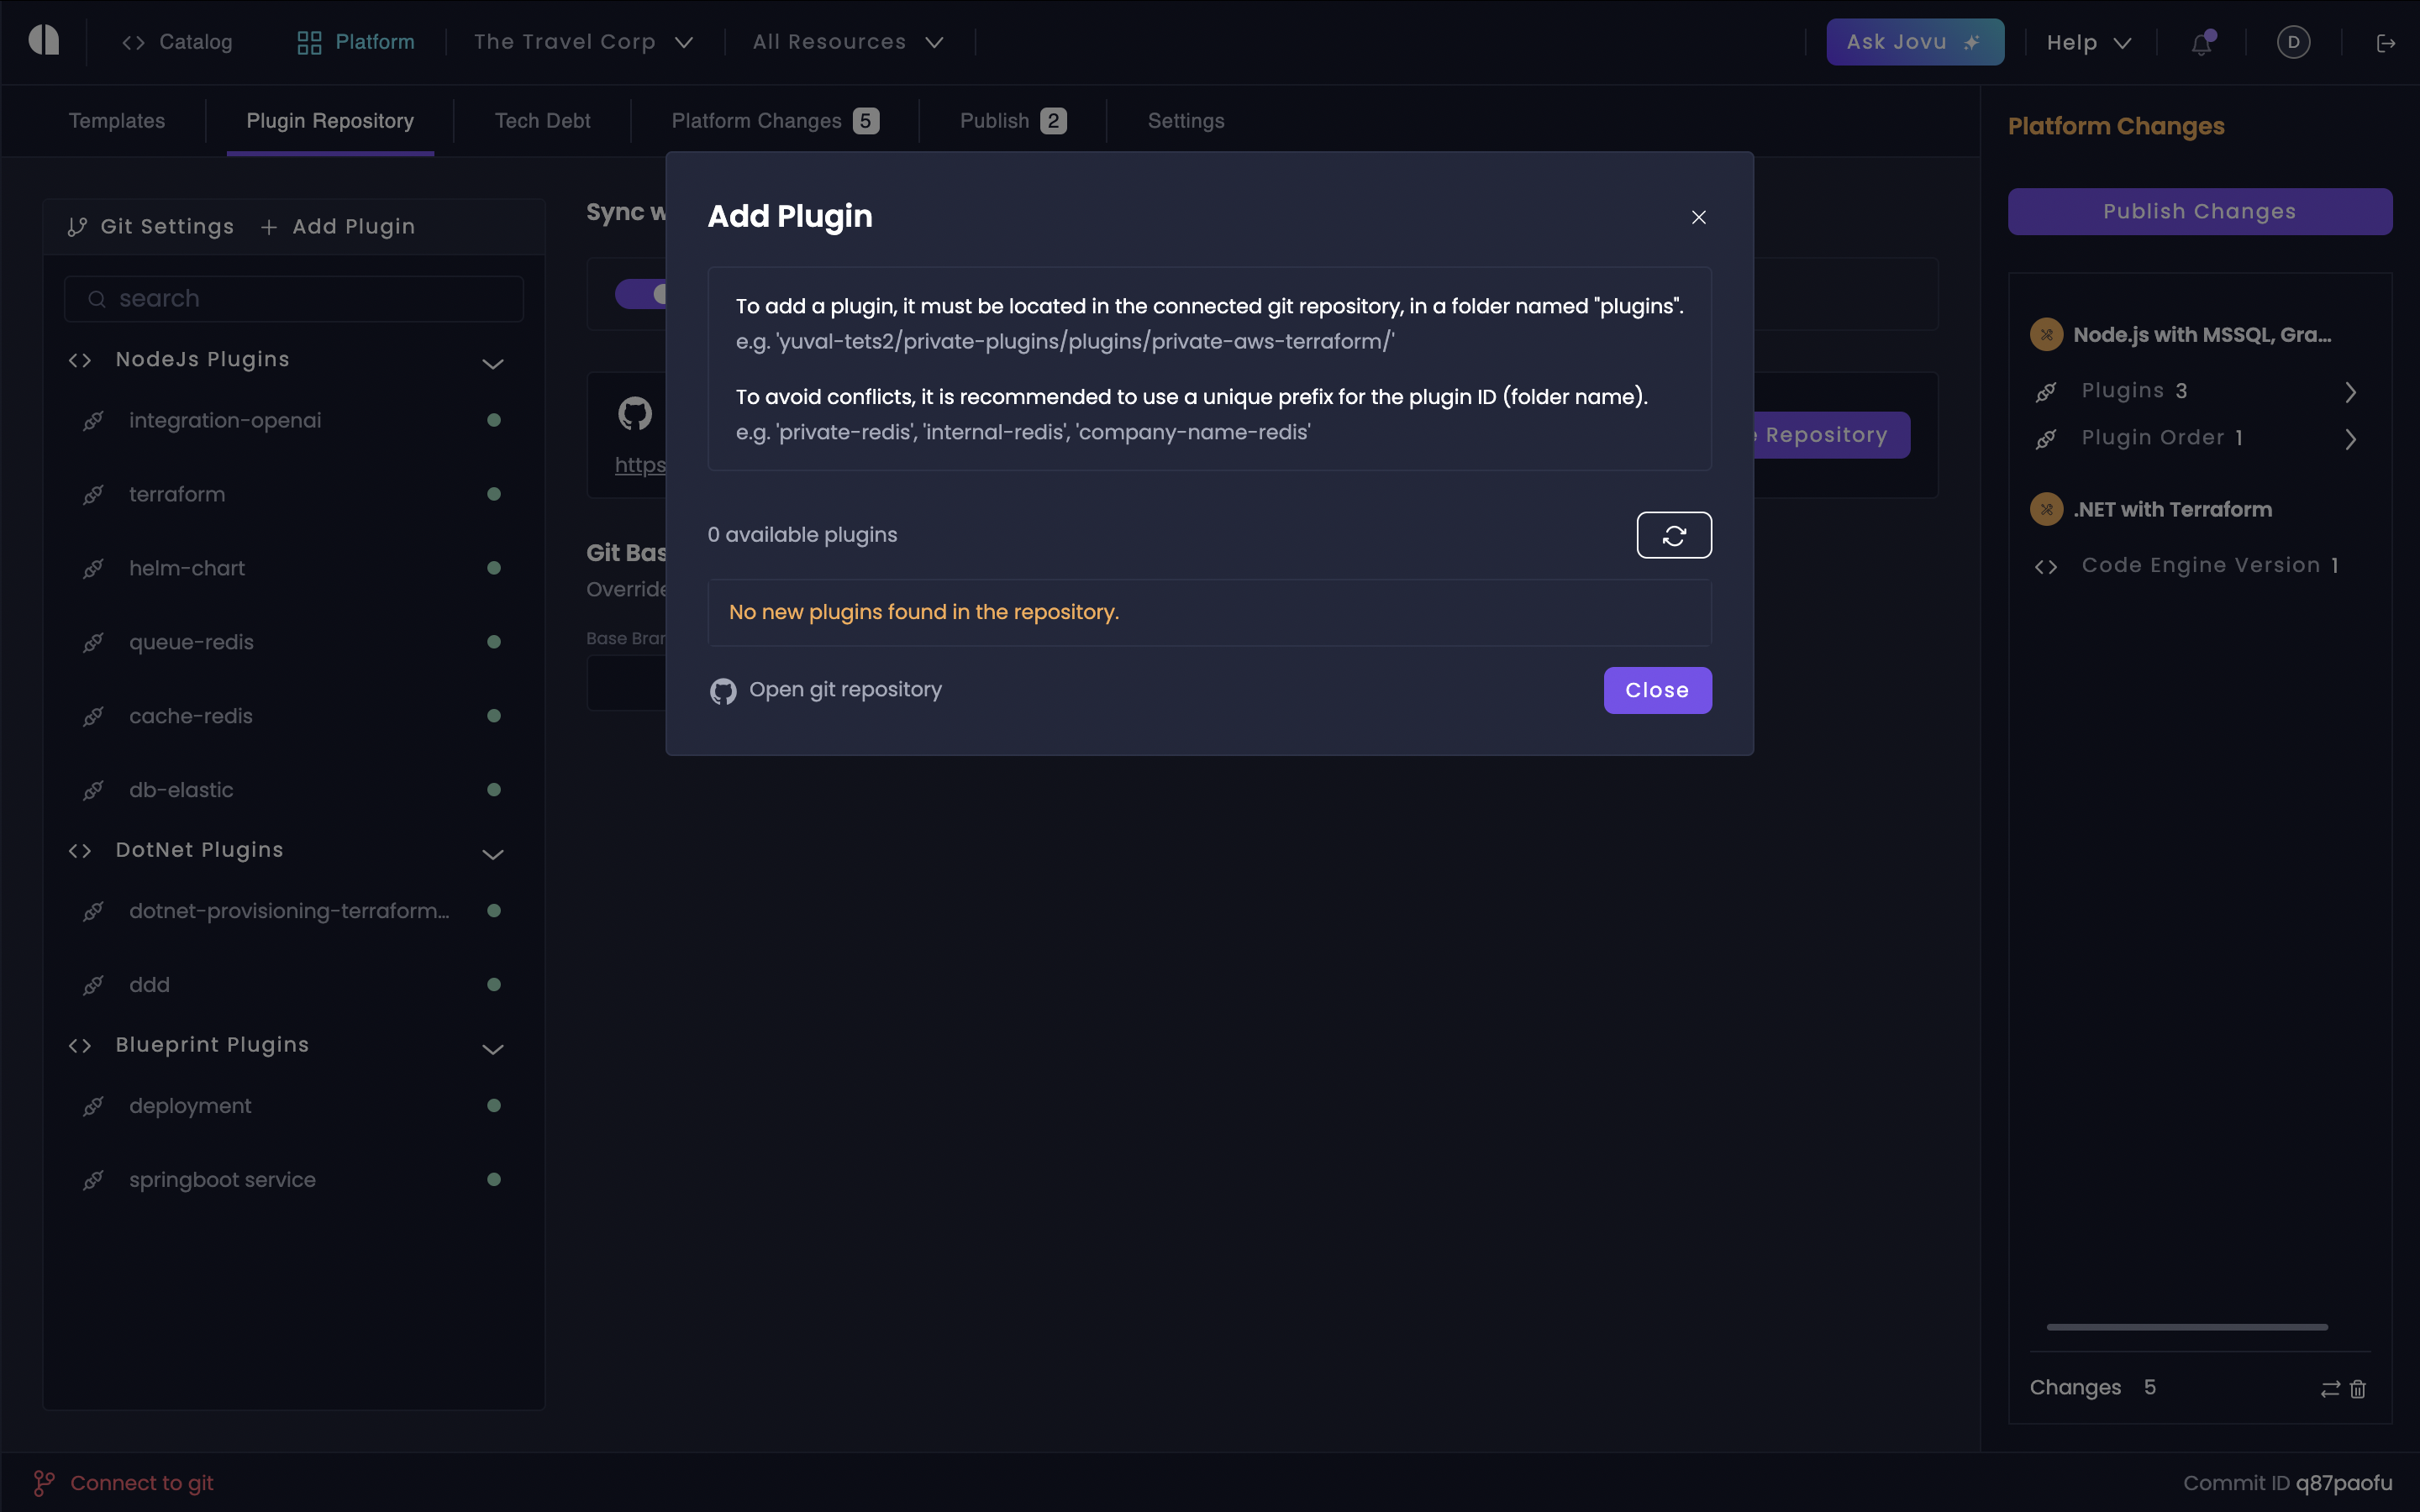
Step 4: Add Your Plugin in Amplication
When you click the Add Plugin button in the Plugin Repository tab, Amplication will automatically scan for new plugins in your connected repository’splugins directory. The system will display any newly detected plugins that haven’t been added to your project yet.
If no new plugins are found, you’ll see a “No new plugins found in the repository” message. Ensure your plugin folder is properly created and named before attempting to add it.
Next Steps
With your repository and folder structure in place, you’re ready to continue setting up your private plugin:Define Plugin Settings
Configure your plugin’s basic settings and parameters
Plugin Events
Learn about available plugin events and hooks
Lifecycle Functions
Understand plugin lifecycle and execution flow