Documentation Index
Fetch the complete documentation index at: https://docs.amplication.com/llms.txt
Use this file to discover all available pages before exploring further.
Configuration Options
The following options allow you to configure how your plugin appears and functions within Amplication:Display Name
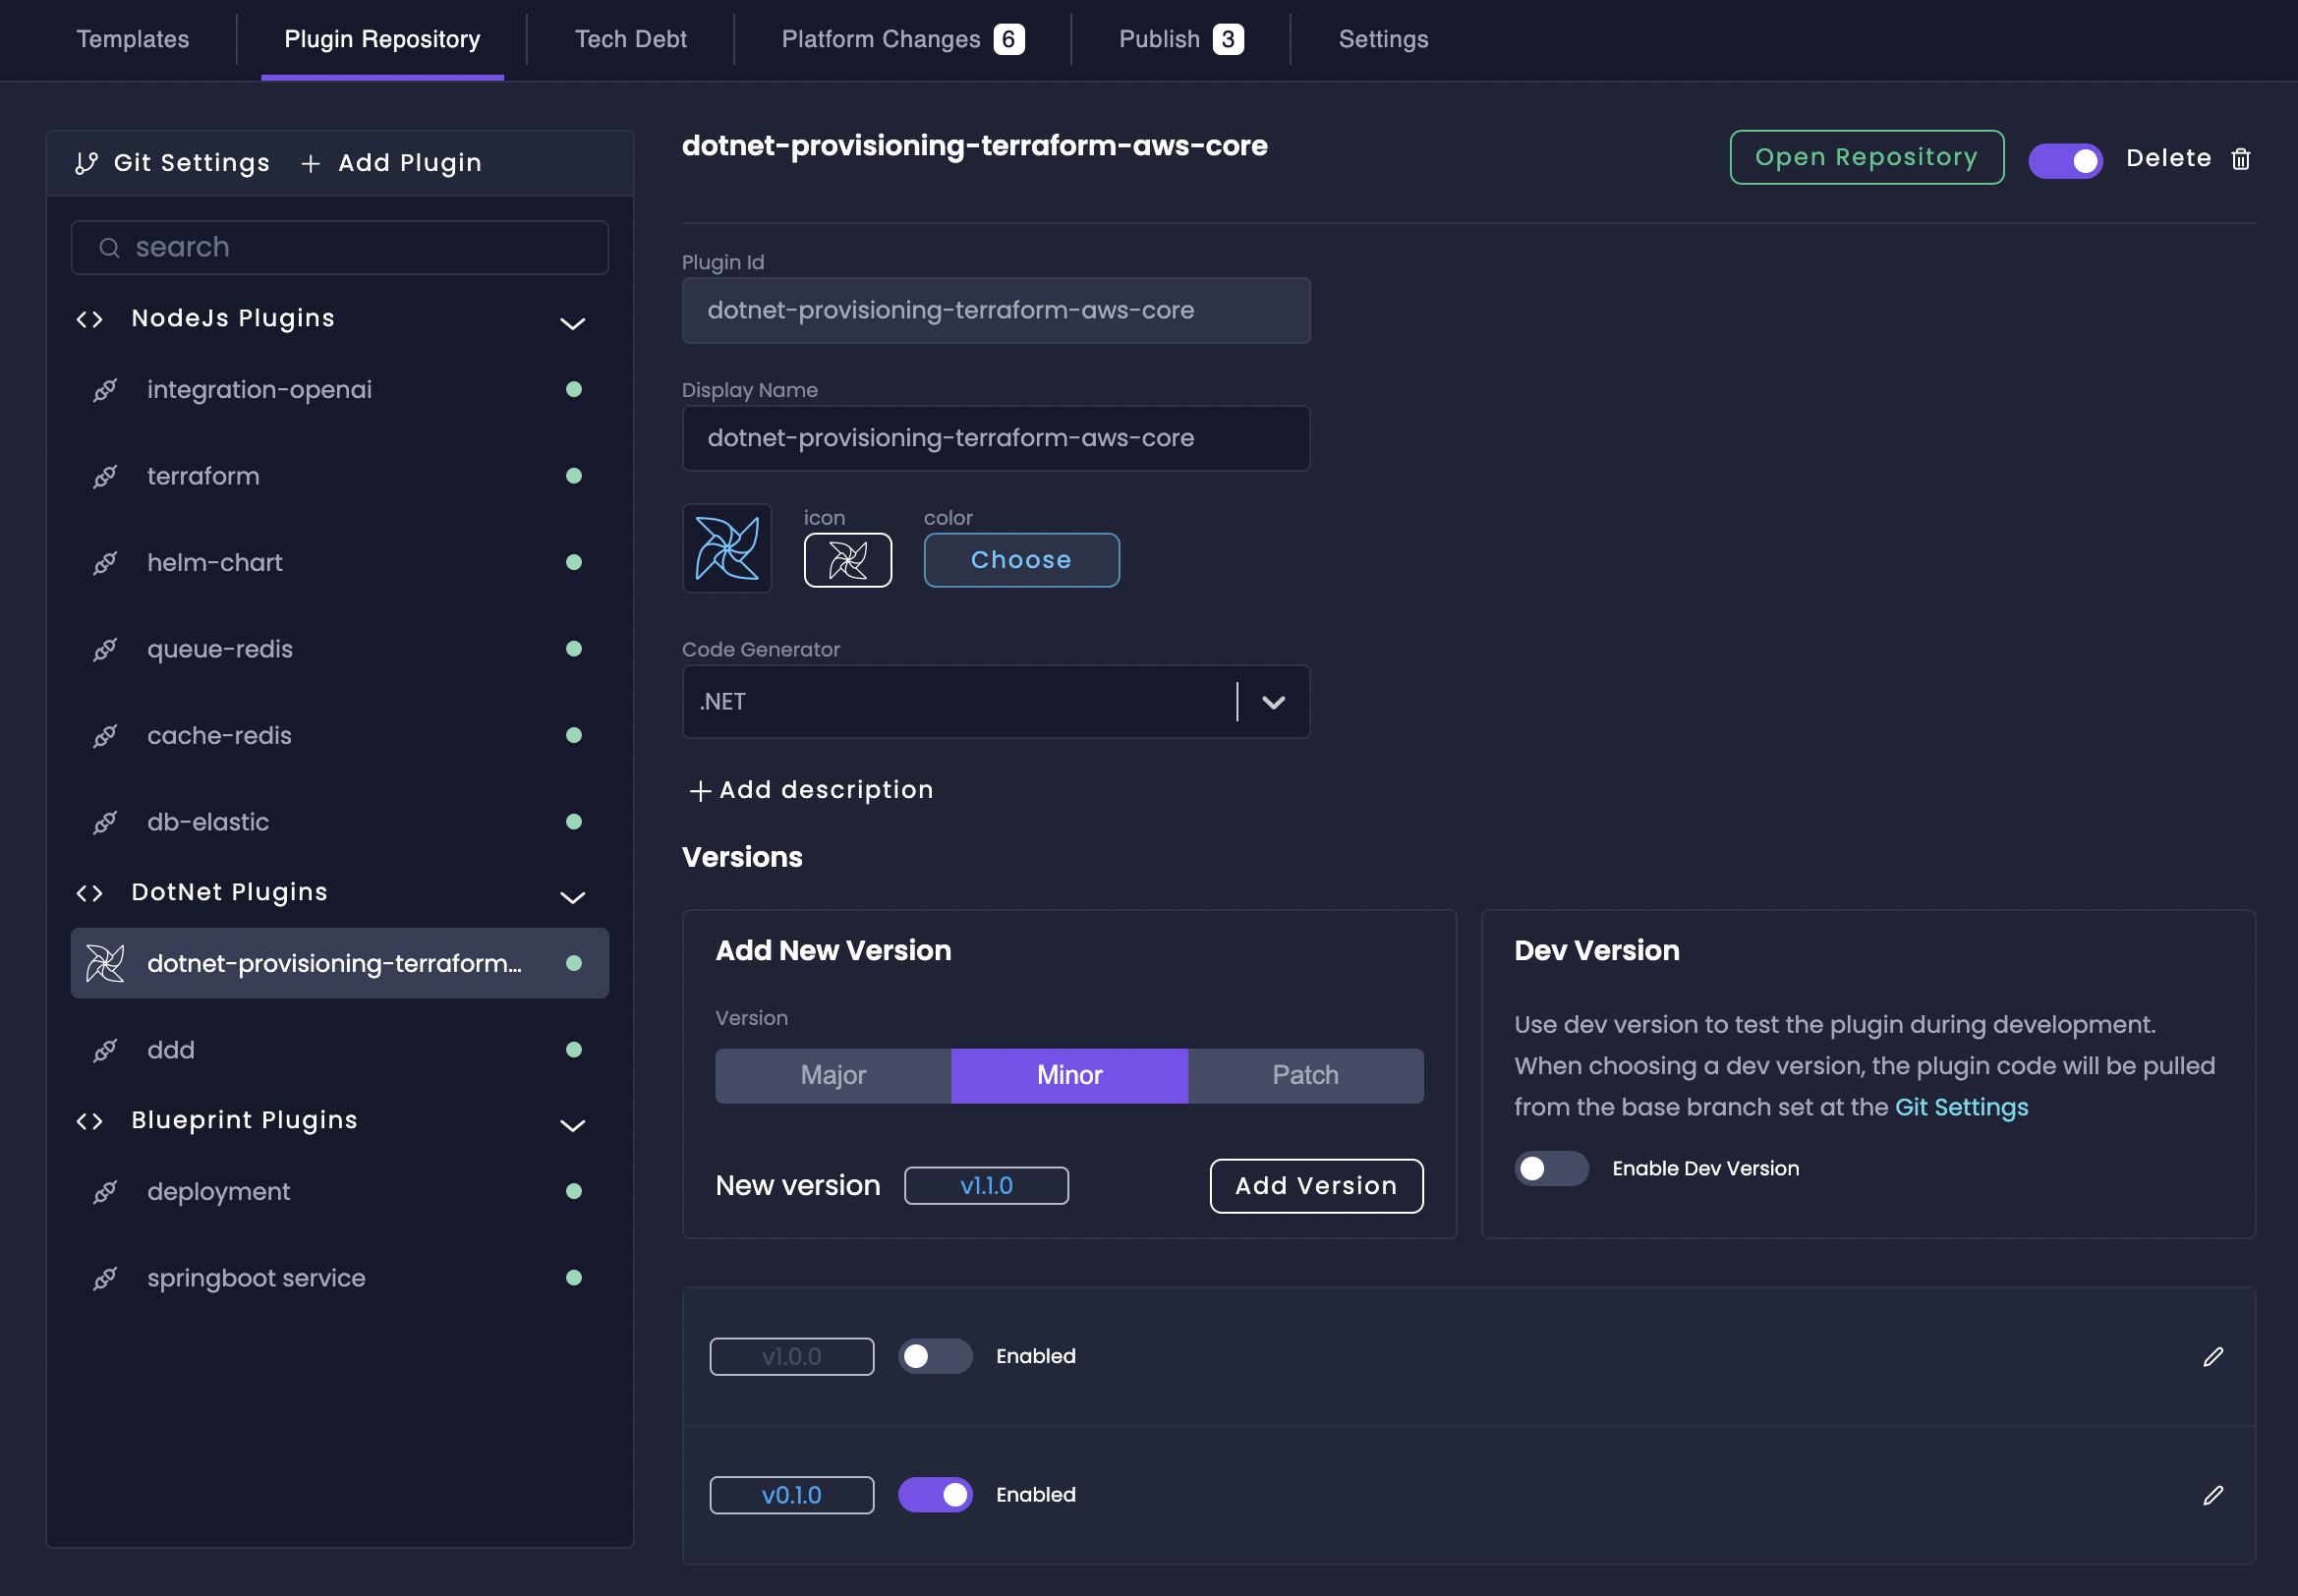
Display Name
By default, the display name of your plugin is the same as its Plugin ID. However, you can customize this to make it more user-friendly and descriptive within the Amplication UI.
A clear and concise display name helps your teammates quickly understand the plugin’s purpose and functionality when browsing available plugins.
Custom Icon & Color
Custom Icon & Color
Amplication provides a library of icons and color palettes to visually represent your plugins. Choosing a custom icon and color makes your plugins stand out in the UI and enhances visual recognition.
This visual distinction is especially helpful when you have multiple plugins in your organization’s repository. A recognizable icon can significantly speed up plugin discovery and selection.
Code Generator
Code Generator
The Code Generator option determines which code generator the plugin is built for (e.g., .NET, Node.js, Blueprints). This option dictates:
- Plugin Compatibility: A plugin built for Node.js will only be available for Node.js based resources.
- Plugin Events: Each code generator exposes a specific set of .
Description
Description
The description appears in the Amplication UI and provides valuable context to your developers. A well-written description should clearly explain:
- The plugin’s purpose and functionality
- The problems it solves or the enhancements it provides
- Any specific use cases or requirements
Versions
Versions
The Versions section allows you to manage different iterations of your plugin. This is crucial for:
- Publishing new versions as you improve your plugin
- Controlled updates via Pull Requests when new versions are available
- Maintaining consistency across all services in your organization
Dev Version
Dev Version
When enabled, Dev Version allows Amplication to pull the plugin code directly from the base branch (e.g., main, develop) defined in your Git settings.
This option streamlines plugin testing during development by avoiding the formal plugin publishing process, allowing for quicker iterations and experimentation.