Sync with Bitbucket
Amplication can push the code of your app to a Bitbucket repository. It will provide you with full control over your project and will also allow you to easily track the code generated by Amplication.
Amplication's Sync With Bitbucket feature is only available for users on an Enterprise plan.
This page provides you with everything you need to work with Bitbucket. You'll learn how to do the following:
- Authorize Bitbucket
- Create a new Bitbucket repository
- Connect to a specific Bitbucket repository
- Change git providers for a specific service
- Create a new pull request for Bitbucket
Let's dive right in.
Prerequisites
If you're running Amplication locally, first read Connect Amplication server to Bitbucket. You'll learn how to configure the server to work with a new Bitbucket application.
Authorize Amplication to access BitBucket
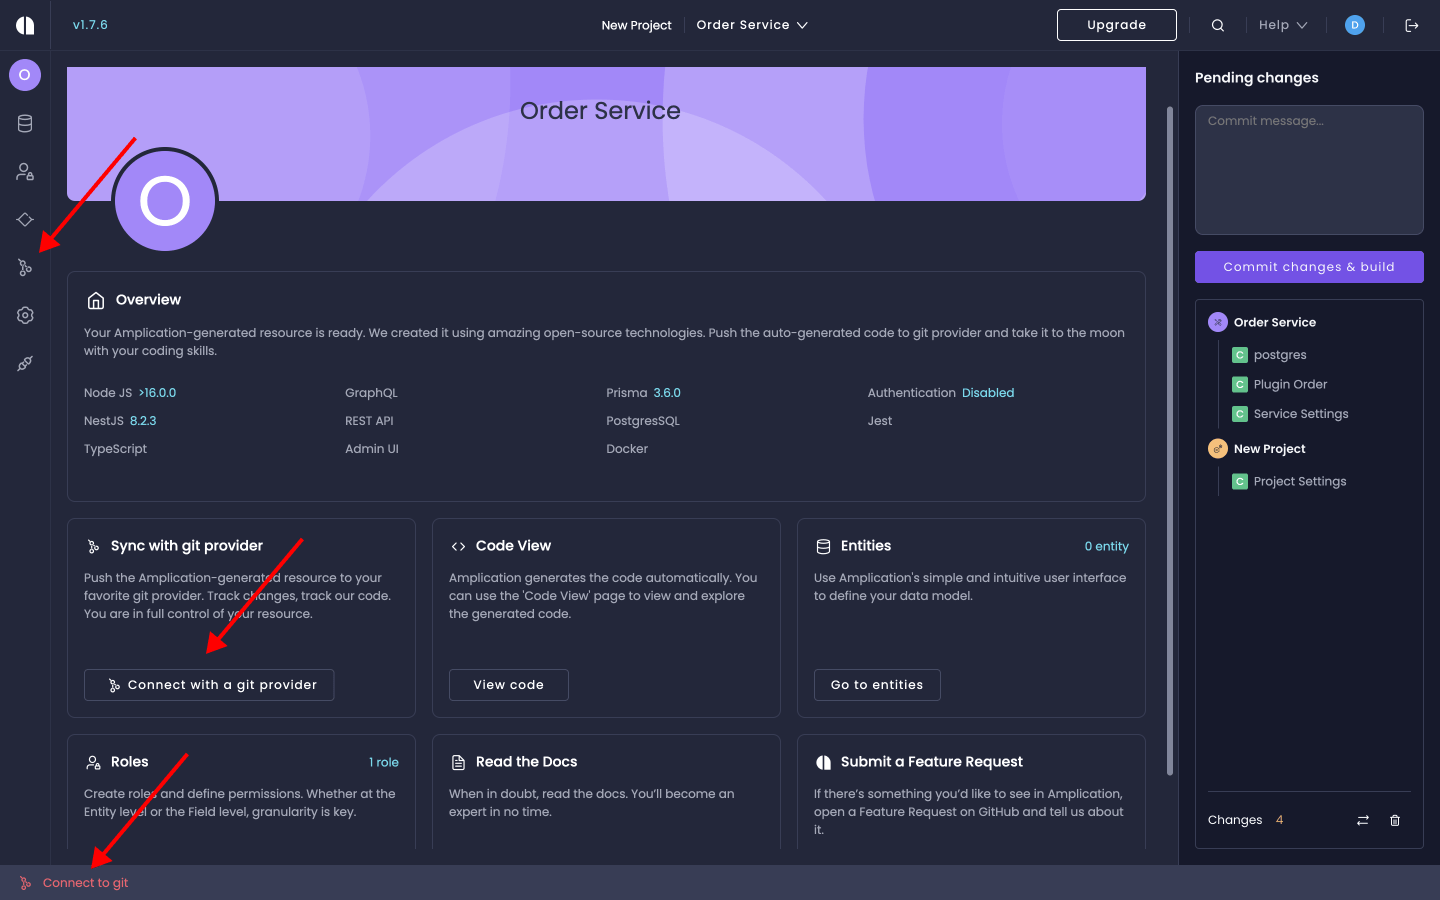
First, go to your project's dashboard. You'll need to go to the Sync with Git Provider page. There are 3 ways to do this:
- Click Sync with git provider on the sidebar.
- Click on the Sync with git provider tile on your project's dashboard.
- Click Connect to git on the footer at the bottom of the page.
You're now on the Sync with Git Provider page. Proceed with the following steps to connect a Bitbucket repository to your service:
- Click on the
Select organizationdropdown. - Click on the
Add Organizationbutton at the bottom of the dropdown. - Click on the
Connectbutton for Bitbucket that appears in the Select Git Provider modal.
If you're already connected to Bitbucket, you can either add another Bitbucket organization or select an account you connected to previously.
You can then go to selecting your repository.
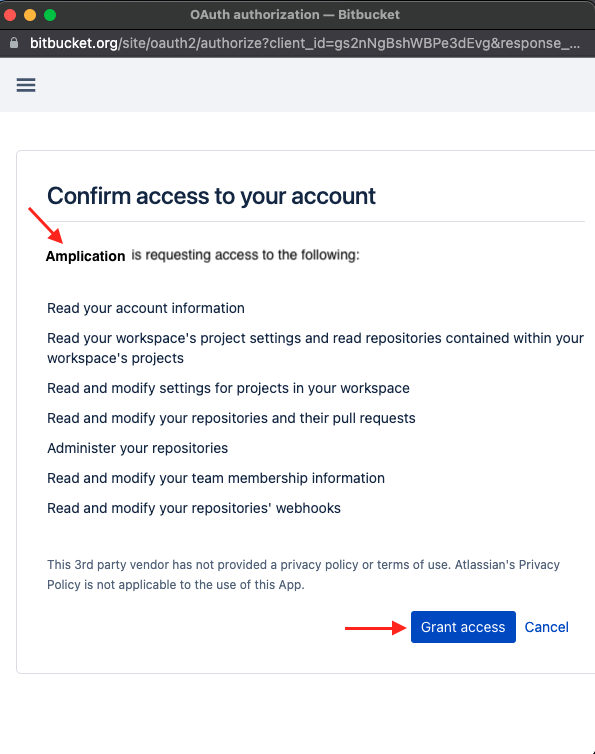
You will be redirected to Bitbucket.
Once the connection is established, you can either create a new Bitbucket repository to connect with or select an existing one. Regardless of the option you choose, you will need to select the Bitbucket workspace.
If you're creating a new repository, this will be the workspace where your new repository will reside. If you're connecting to an existing repository, this should be the workspace where your current repository is located.

Now it's time to create a new repository or select an existing one.
Create a new Bitbucket repository
First, navigate to your Bitbucket account and select the workspace where you'd like the new repository to live.
Once you're in the chosen workspace, click on Create Repository.
Select Your Repository
You'll see a modal appear with a populated list of repositories based on your configuration settings from above.

Change Your Service's Repository or Git Provider
Each project will have a default repository set when you create the first service. Every new service you create within this project will inherit the default repo.
But, it's possible to override the default and set a new repo on a service-by-service basis. There are two ways to do this:
When creating a new service using the Service Creation Wizard. You will have the option to turn on the
Override default settingstoggle during the Git Provider selection step.By visiting the service's Sync With Git Provider page. On this page you can also turn on the
Override default settingstoggle and change the target repo for the service.
You will be able to connect a new git provider, like GitHub or another Bitbucket account.
After selecting the git provider and organization you want to proceed with, the repository selection modal will appear again. You can now select a new repository for this specific service.
Create a New Pull Request
First, make changes to your service.
Follow our Building New Versions of Your Service guide to go through the steps of changing and making additions to your service.
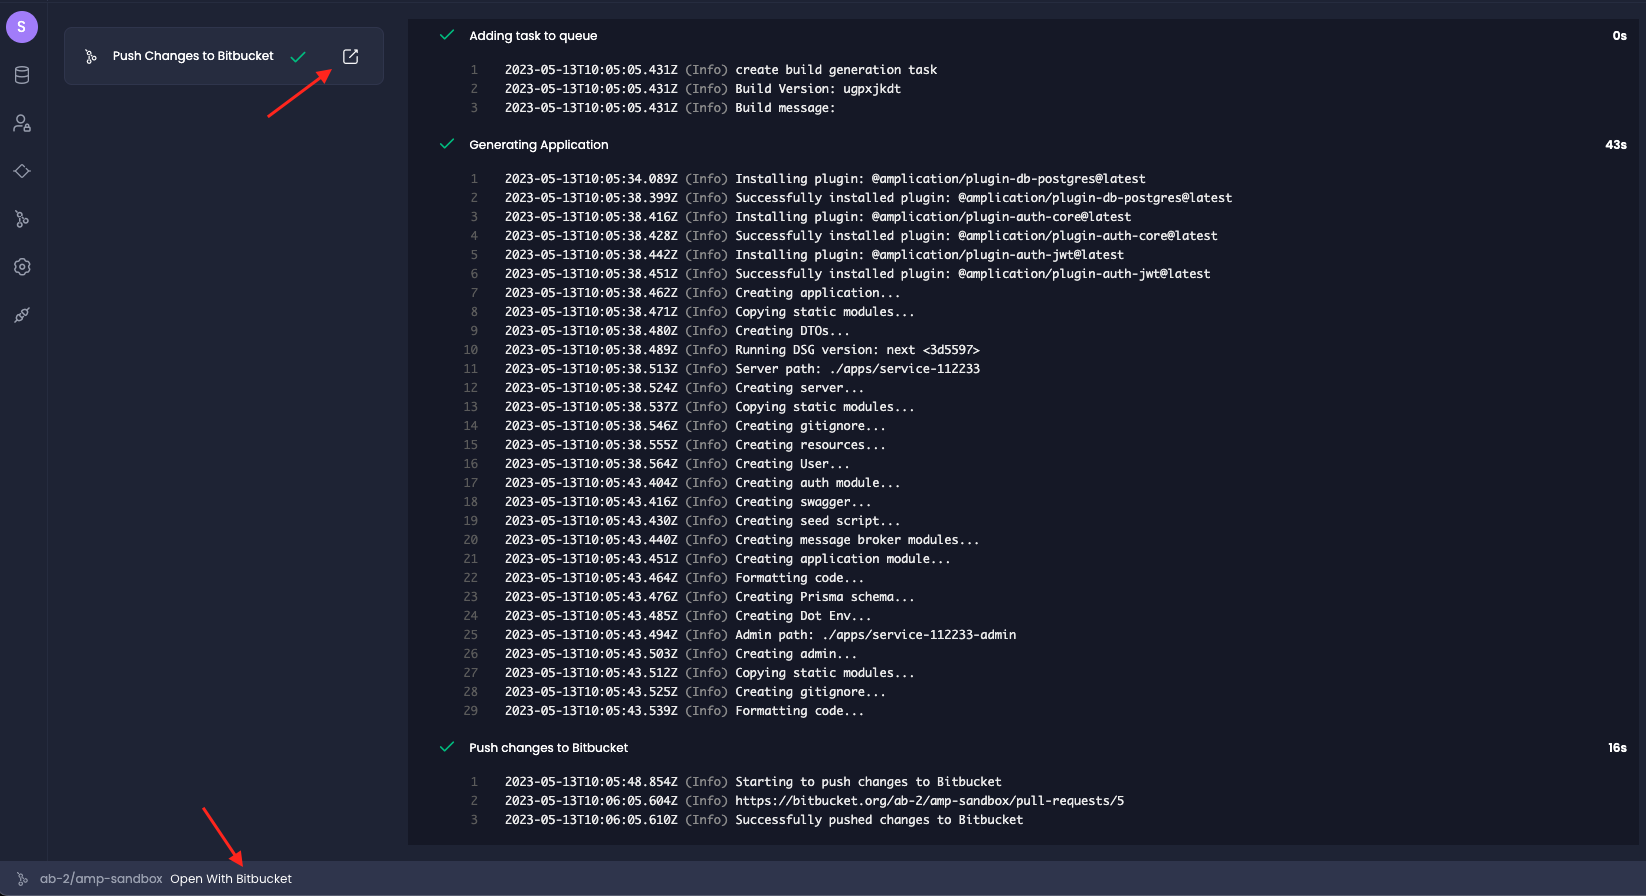
After making changes to your service, navigate to the Pending Changes section in the right sidebar. Write a commit message and click on Commit Changes & Build.
This will take you to the commits page. Here you can select the service for which you wish to view the build log. Once the build process is completed, you can open the pull request generated by Amplication within Bitbucket. You can do this by clicking either on the footer or on the "Push Changes to Bitbucket" action step.
And there you have it – a new pull request ready for review.
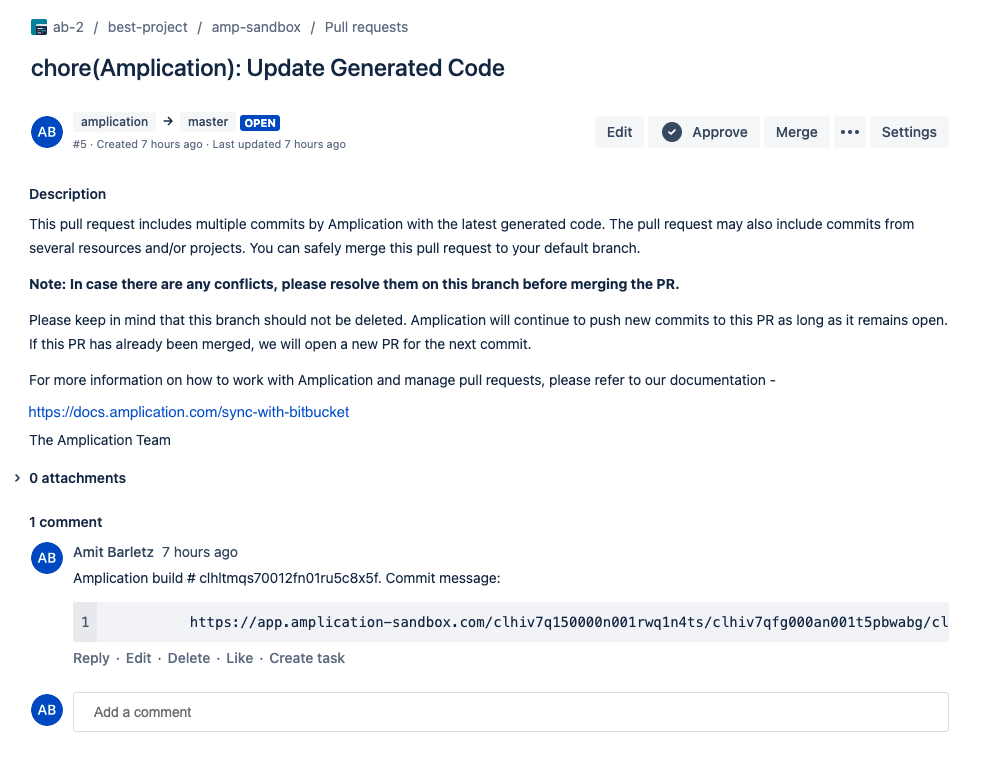
Amplication creates pull requests from the amplication branch into your repository's default base branch. Pro and Enterprise users can change the base branch for these pull requests